
# Firewalls
# New firewall/Cluster
# New Firewall
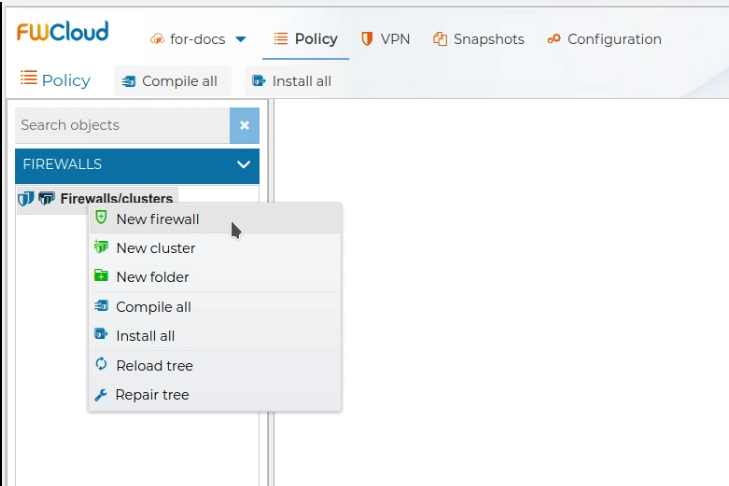
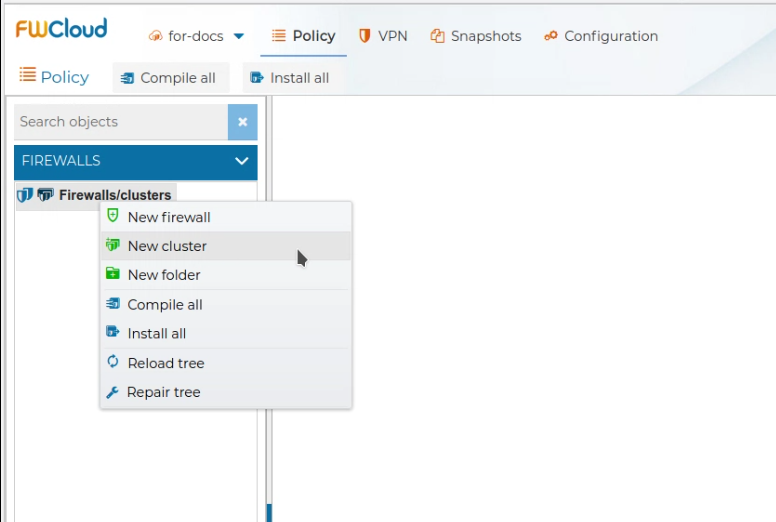
To create a new firewall just right click over the Firewalls/clusters tree root node and select New firewallfrom the menu.
You will presented a form in which you should write the name of your new firewall. Also you can fill in the Description, and select the compiler.
In the current version you can choose from the IPTables and NFTables as compiler formats. IPTables format is selected by default.
Finally select the communication method to be used:
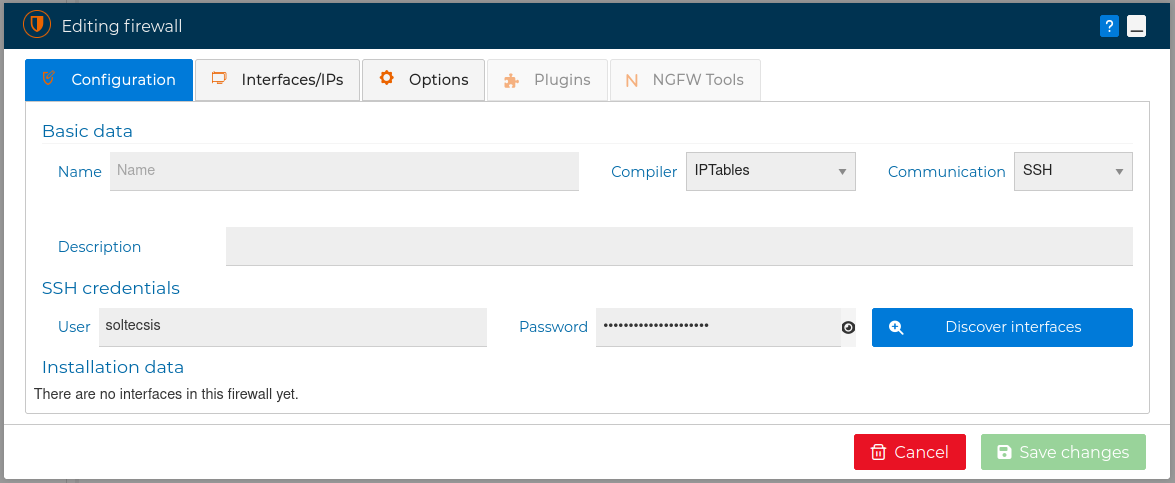
FWCloud requires access to the firewall for managing it. This communication between FWCloud and the new firewall can be carried out in two ways: SSH and FWCloud-Agent. Each of them uses a different authentication mechanism.
SSH / FWCloud-Agent credentials
In both methods the credentials sent from FWCloud-UI to FWCloud-API encrypted using strong PGP public key cryptography with key pairs generated on the fly for each session
In the following sections we describe these two methods:
# SSH Communication
Communication via SSH protocol is the simplest since it does not require you to carry out any installation on the firewall to be managed, but it has the disadvantage that you are using a service such as SSH that allows full access to the managed firewall.
Using this method when FWCloud needs access to this firewall it will use the SSH User and Password credentials defined in the firewall form. If you don't supply these credentials, they will be requested when needed.
WARNING
For security you can keep the password field blank and the password will be asked every time when needed
The security policy is loaded into the firewall using a SSH connection. Therefore, you need to have SSH access from the FWCloud server to the destination firewall. For this connection the IP address assigned to the interface configured in the firewall will be used.
If your firewall is outside your premises, just use SSH over a VPN connection. In the VPN section you can see how easy is to create a VPN infrastructure using FWCloud-UI.
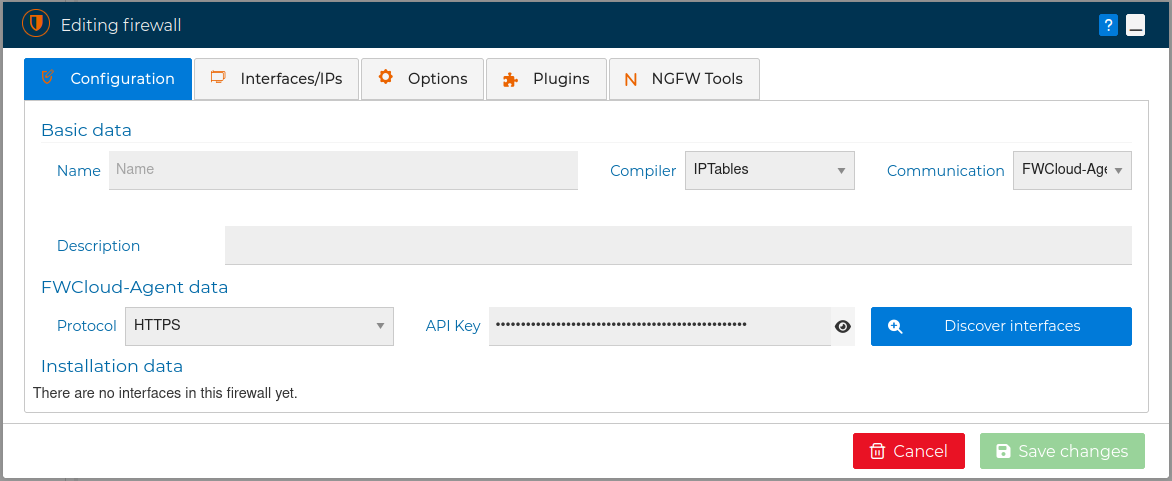
# FWCloud-Agent communication
By the other hand the communication option through FWcloud-Agent is the most recommended, since it simplifies and optimizes communication with the managed firewall.
It is a service that is installed on the firewall through which the FWCloud console carries out the necessary actions on the managed firewalls. This service is installed using the .deb or .rpm packages corresponding to the Linux distribution that you are using. See FWcloud-Agent installation for more information. Also you have a video demonstration at the bottom of that section.
FWCloud-Agent improves security in the FWCloud – FireWalls interaction, since it does not require SSH credentials any more, instead of it an API Key is used. This key is automatically generated during the package installation process in the firewall.
In addition, it is possible to restrict access to this service only from the IP of the FWCloud console.
Using FWCloud-Agent instead of SSH also means that you restrict the actions that can be done on the firewall only to those that the FWCloud-Agent service allows. That is, you are not using a general scope protocol like SSH that allows you to do much more than what is needed in the FWCloud – FireWalls communication.
Another additional advantage of using FWCloud-Agent is that it allows extra functionalities, such as the history of VPN connections .
In both cases the firewall settings can be modified at any moment by double clicking the firewall or by right click and selecting Edit firewall from the context menu.
By editing the firewall settings you can select which interface, and IP address FWCloud-UI will use to access the firewall.
# New Cluster of Firewalls
To create a new cluster of firewalls just right click and select New cluster from the context menu.
Give a name to the cluster and add as many nodes as your cluster has with their credentials and save the changes.
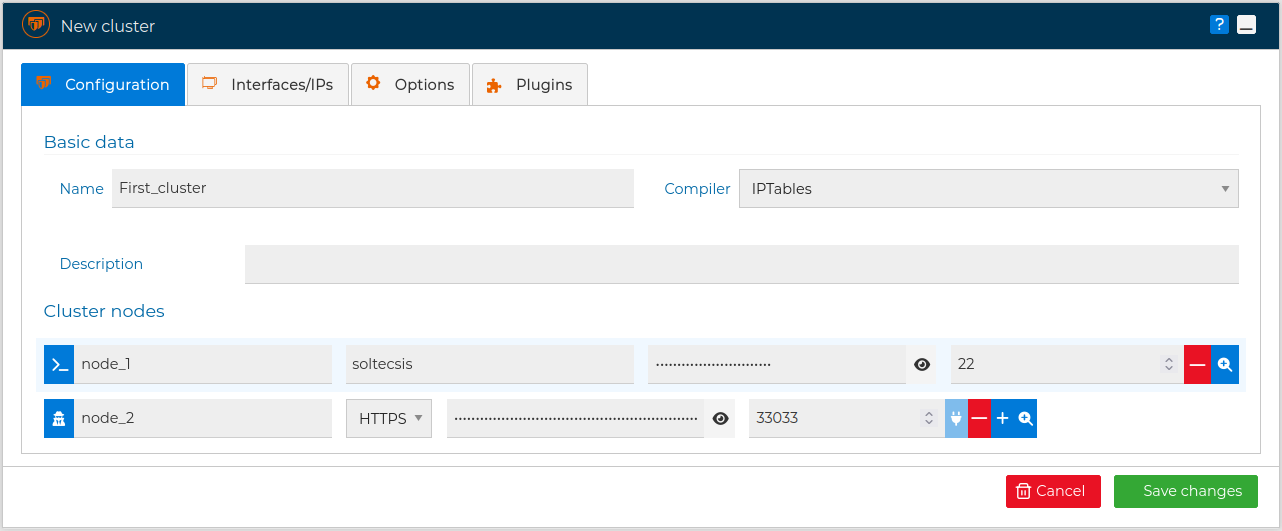
Communication method
Note the icon on the left of the name of the nodes. The communication method can be SSH or FWCloud-Agent, and not all nodes need to use the same method.
The cluster settings can by modified at any time by double clicking on the cluster name or just right click and select Edit from the context menu.
Also the setting of any of the nodes can be changed by double clicking over the node name.
# New Folder
For organizational purposes Folders can be created. Inside them you can place your firewalls, clusters of firewalls and even more folders, just drag an drop.
Folders as many other elements in the FWCloud-UI can be collapsed of expanded to better focus in the parts you are working on.
You can rename or remove any folder. In order to remove a folder it has to be empty.
WARNING
In order to remove a folder it needs to be empty
# Firewall Interfaces
# Interfaces
When configuring the firewall or firewalls cluster you have to set up its network interfaces.
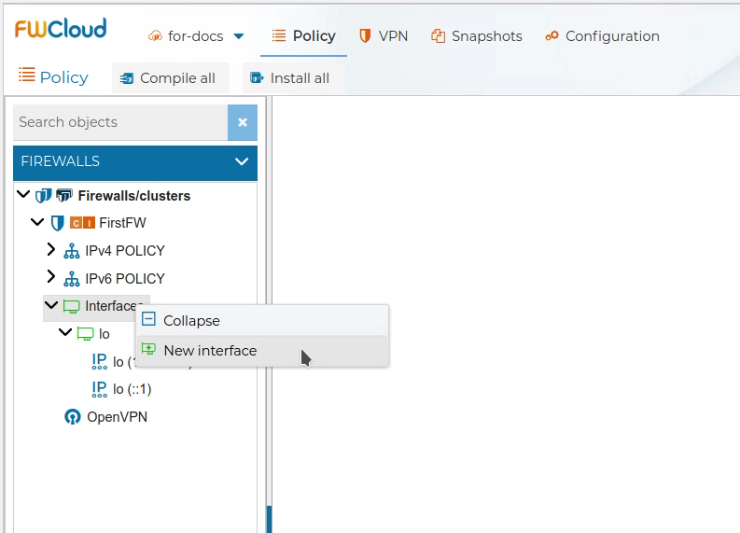
You do not need to set up all interfaces, for simplicity you only need to define the ones that are going to be used by the firewall's policy. But in order to be able to install the policy in the firewall, at least one interface needs to be defined. The loopback interface is automatically defined when a new firewall is created. This can be used if FWCloud and the firewall you are configuring are going to be in the same device. To select which interface it will use edit the settings of the firewall. See Firewall .
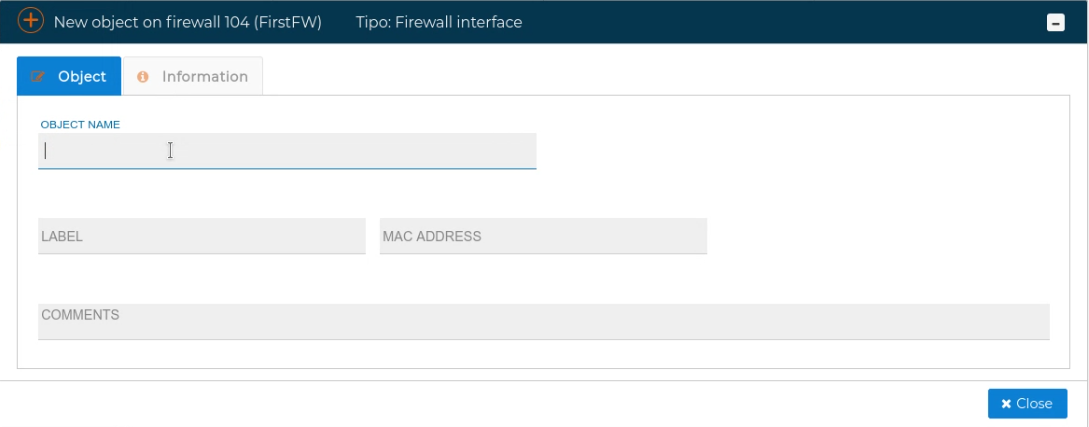
To add a new interface just right click over Interfaces and select New interface.
A form pops up, where you can set up the object name, that is the interface names like eth0 or ens1, a label, the MAC address and a comment. Only the interface name is mandatory. Since this name can be included in the policy please use the real name of your device, if not the policy rules affected will not do what they are intended to do.
The name of interface matters
The name of the interface can be used in some of yours security policy rules
LABEL your interfaces
If you want something more informative than the name of the interface then use the label field. Example labels: WAN1, WAN2, DMZ, LAN1, LAN2, etc.
In order to simplify this tedious process of firewall interfaces and IP addresses creation, FWCloud has a very powerful feature called Autodiscover . It makes possible to connect to the firewall by means of an SSH connection and automatically get and create in FWCloud all the interfaces and IP addresses that it has.
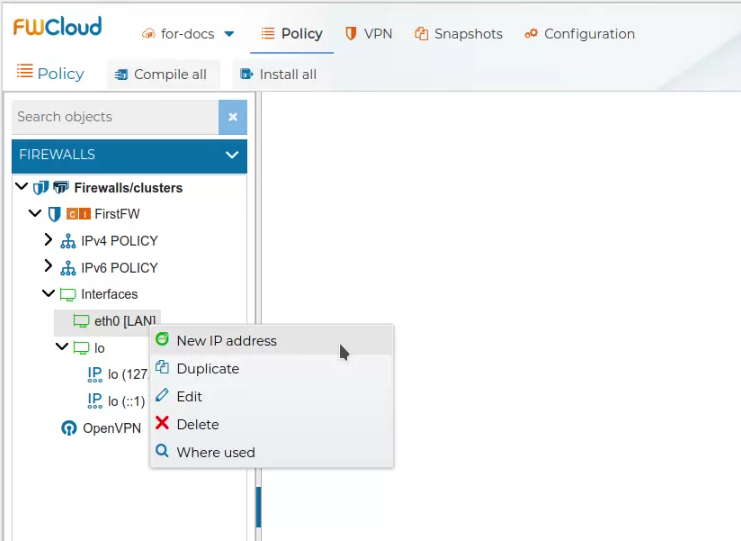
Once interfaces are added, they can be edited, duplicated or deleted. Right click on the interface name to get the context menu.
In this menu there is also a convenient action called Where use. It will head you to the policy rules or objects that use the selected interface. It comes very handy to find a rule.
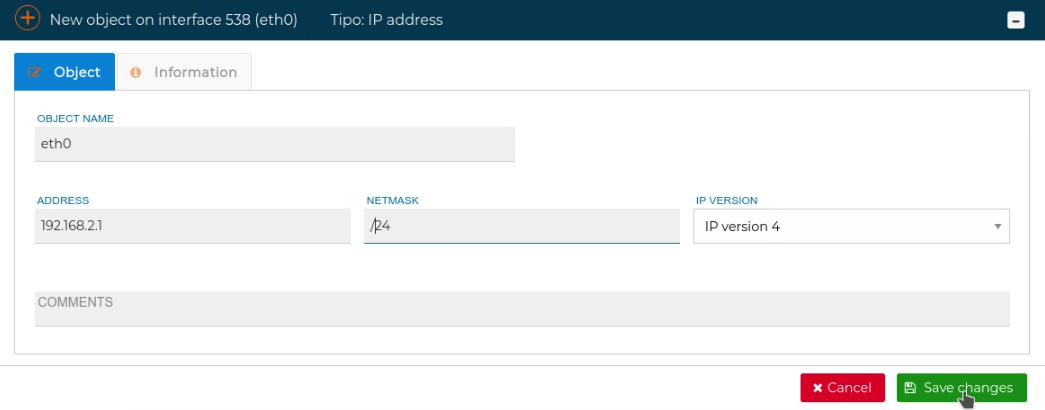
The interfaces can have configured IP addresses. They are set up by right clicking over the interface and selecting New IP address
# Autodiscover
FWCloud has a very handy utility for the automatic discovery of the interfaces and IP addresses a firewall actually has and transfer them into the FWCloud configuration. When your are doing the initial configuration it can save you a lot of time and more importantly it avoids any misspelling in the data.
New interfaces or IPs
You can use the "Autodiscover" feature every time you add new interfaces and/or IPs to your firewall/cluster as an easy way to incorporate them to FWCloud
To access this utility double click on the firewall name and go to the Interfaces/IPs tab in the pop up window.

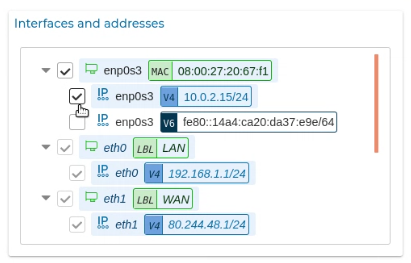
Select the filters you want to apply and press Discover button. On the left side the new items discovered according to the filters applied will appear in a tree-shaped representation.
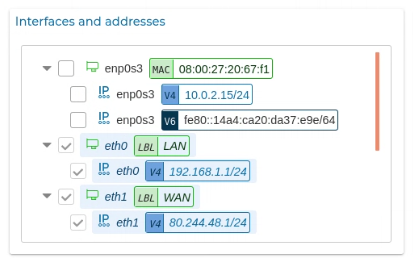
If you hover the mouse over an interface name, a pencil icon  appears, if you click on it you can modify the properties of the interface or the IP address.
It is also possible from this section to select the IP that will be used for firewall management. If you are in a cluster, you will be able to select the installation interface an IP address for each cluster's node.
In the "Autodiscover" tree select the items that you want to incorporate in your FWCloud firewall and, when you press the Save changes button, all the changes will be applied to the firewall/cluster you are editing.
A new windows will show a summary of the actions done and the new interfaces and IP addresses are now part of your firewall configuration. You can edit them or do all the actions interfaces allows.

Let's now see the "Autodiscover" utility in action:
As we have explained this utility is quite useful using it on firewall clusters:
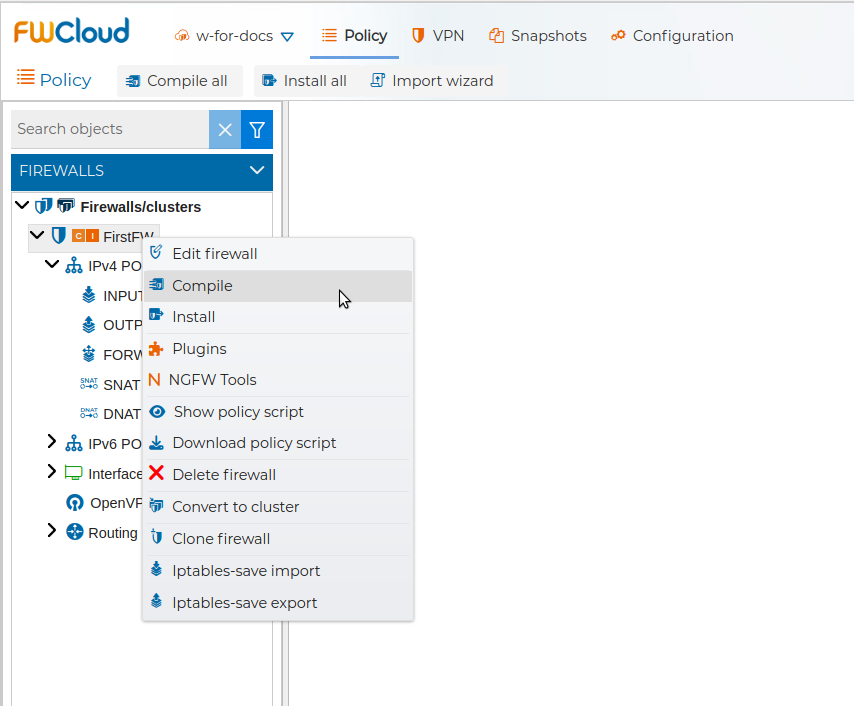
# Compile
# Compile One Firewall
The policy rules of the firewall need to be compiled prior to be installed into the firewall. That is, you are managing the firewall policy offline and, when ready, you can upload it to the corresponding firewall or firewalls cluster nodes.
Icons
An orange  at the left of the firewall's name indicates that the firewall policy needs to be compiled
This action will generate all IPTables/NFTables rules and chains needed by the policy specified graphically in the policy panel.
For IPTables and NFTables firewalls, FWCloud can use normal compilation or optimized compilation depending on the firewall or cluster options. Optimized compilation generates grouped iptables-restore and ip6tables-restore blocks for IPTables firewalls, and loads the generated NFTables script with nft -f - for NFTables firewalls, instead of applying every rule as an individual command. This reduces the time needed to load large policies in the destination firewall.
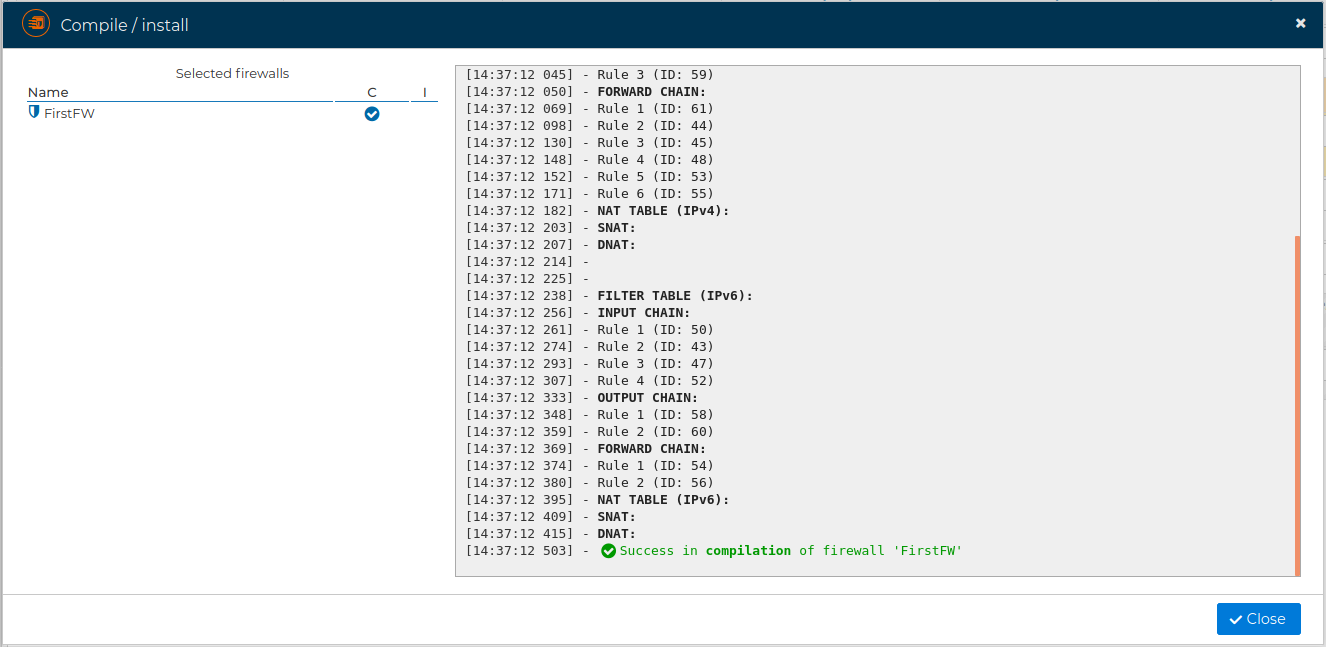
, and hit next
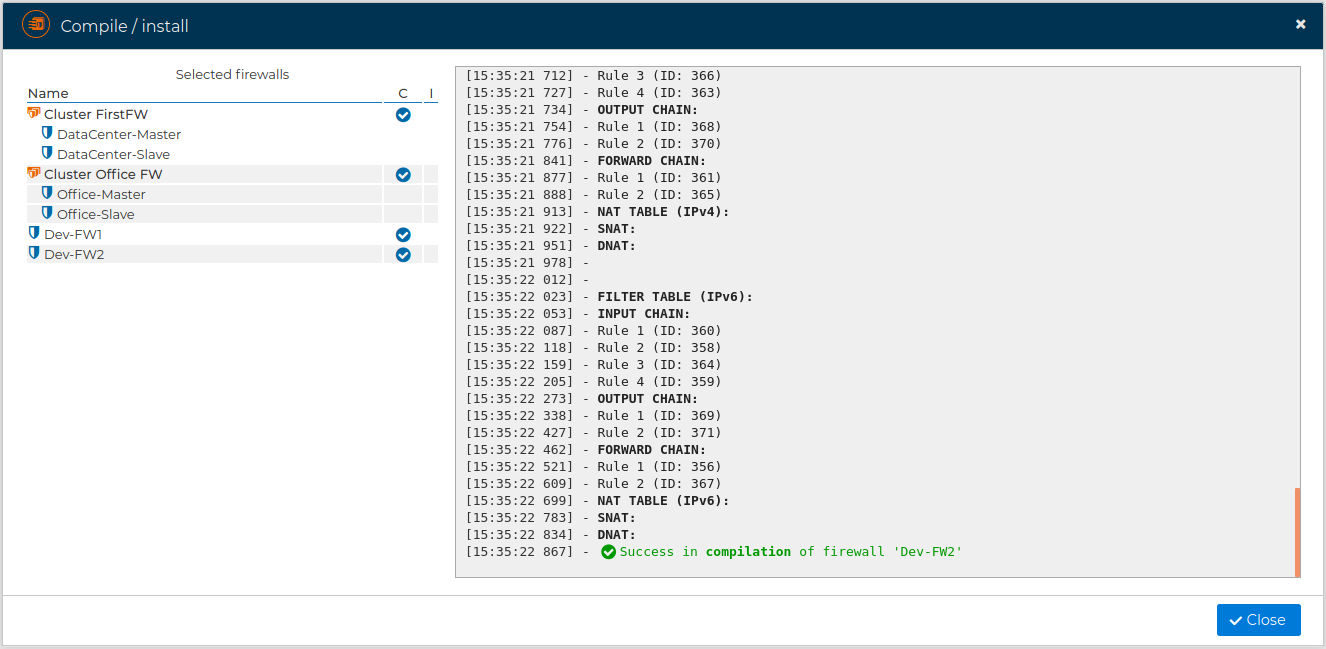
If no problems occur a green message will show the success.
# Compile a Firewall Cluster
If you have a firewall cluster, you do not need to compile the rules for the nodes individually, the rules will be compiled once and installed on all nodes in the cluster.

# Compile All Firewalls
Instead of compiling all firewalls one by one you can save time and do it all together.
From the menu option all firewalls and clusters within the managed cloud can be compiled.
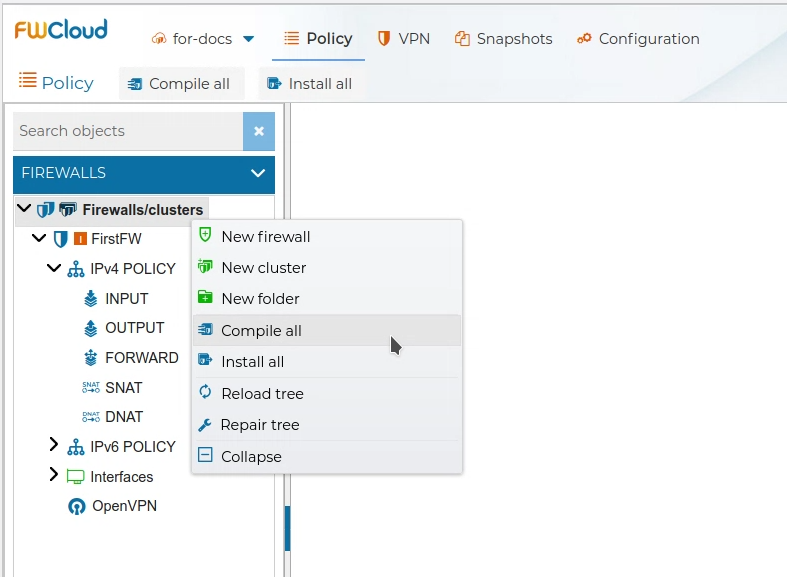
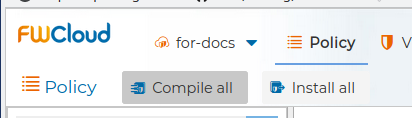
, or using the upper button
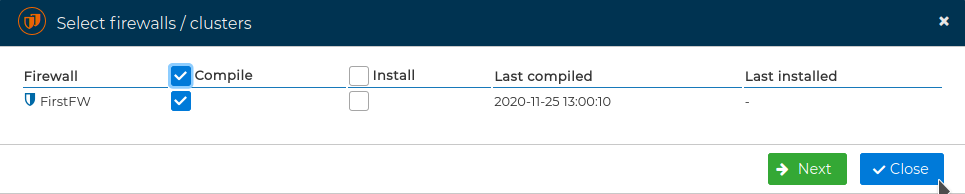
You will be presented a form where you can select the firewalls and clusters you want to compile
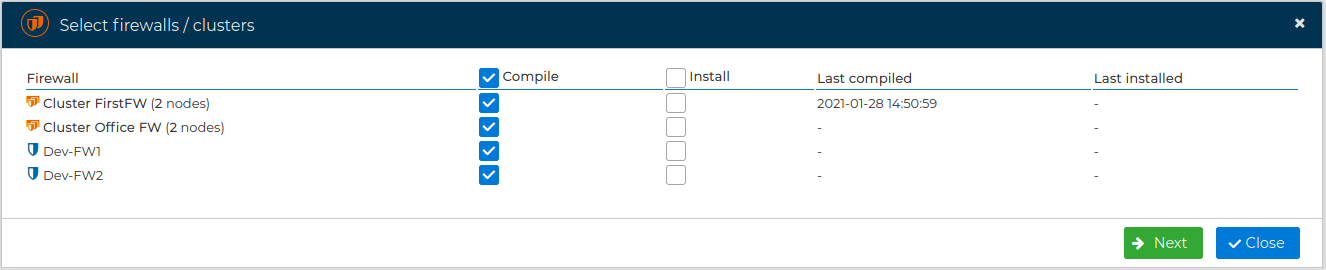
and proceed with the compilation
See also Compile One Firewall section
# Install
# Install Firewall
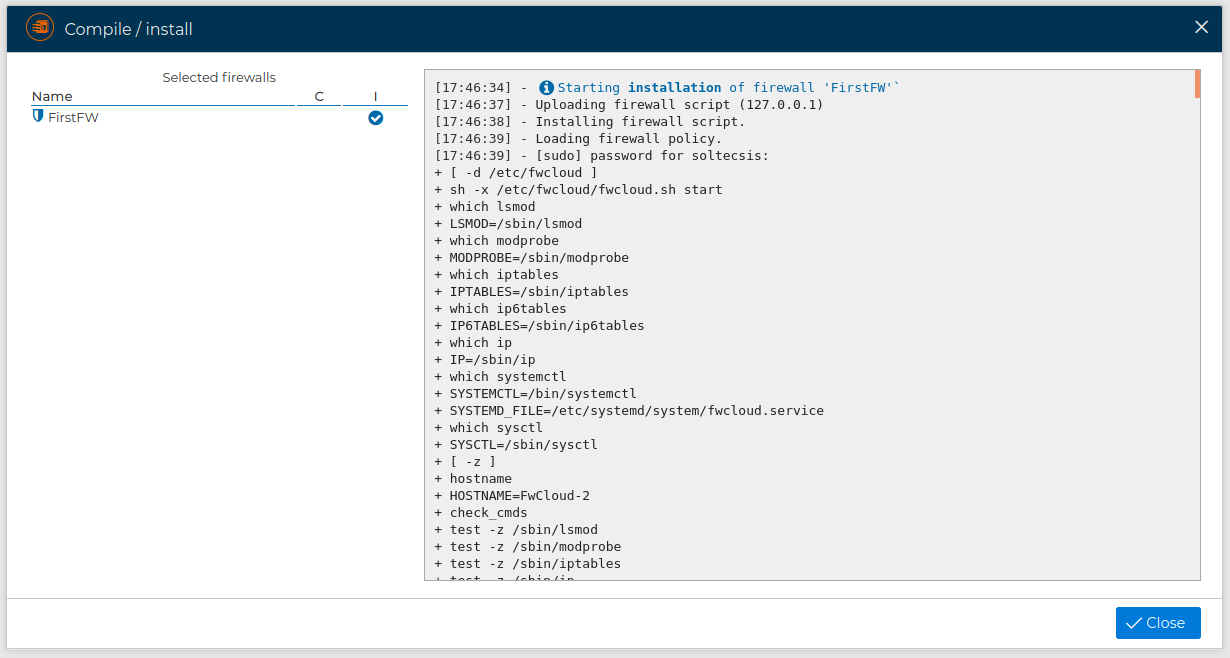
The security policy you have defined in FWCloud-UI needs to be installed in the firewall (or nodes that make up a firewalls cluster).
Icons
An orange  at the left side of the firewall's name indicates there are changes in the policy pending to be installed
Previously to install it you need to compile the policy. This can be done by selecting Compile option in the firewall menu or directly when installing by marking the square box Compile. If the firewall requires policy compilation the checkbox will be checked automatically.
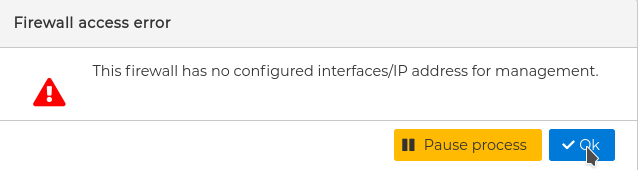
FWCloud will install the policy compilation script in the destination firewall by means of SSH and using the IP address you have setup in the Firewall configuration. This address can be modified editing the firewall settings.
If no interface is set, the firewall will not be reachable and you will get an error.
Before the installation begins you will be asked to supply the SSH username and the password if not saved in the firewall's configuration. For security reasons we recommend not to save it.
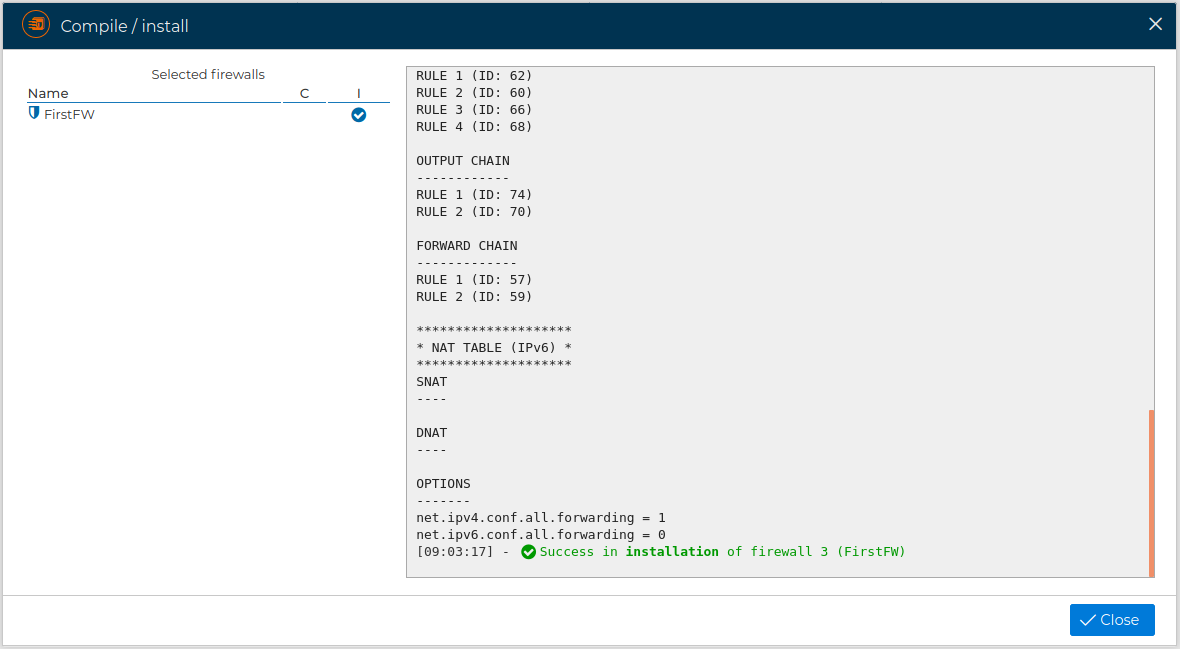
Once done you can see the result of the installation processes
# Install a Firewall Cluster
If you have a firewall cluster, you do not need to install the rules for the nodes individually, the rules will be compiled once and installed on all nodes in the cluster.

# Install All FWs
Instead of installing all firewalls one by one you can save time and do it all together.
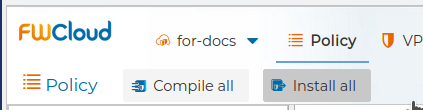
From the menu option all firewalls and clusters within the managed cloud can be installed.
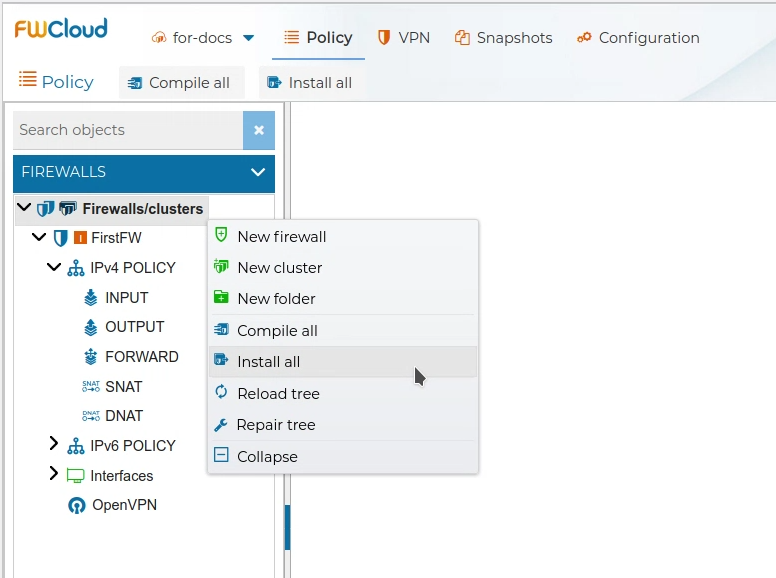
, or using the upper button
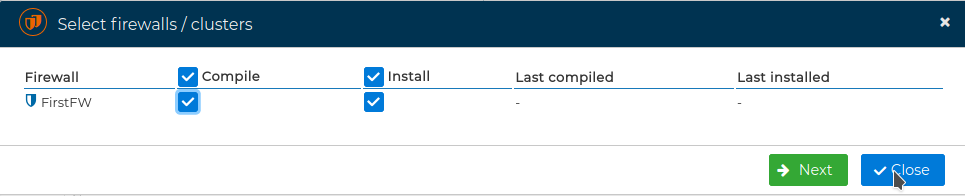
You can select which firewalls or cluster of firewalls you want to intall
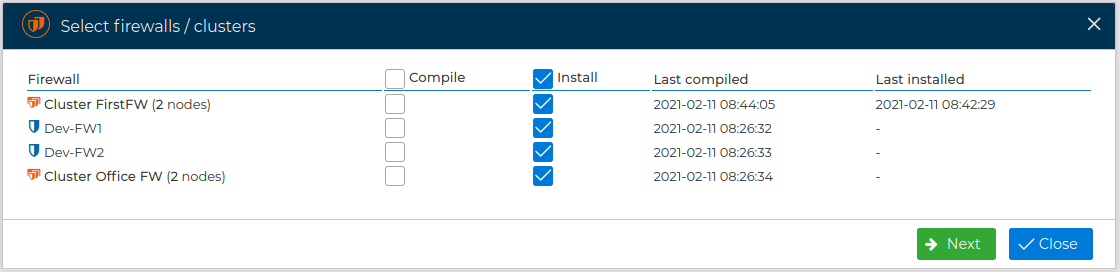
The SSH username and the password of all firewalls will be asked if they are not saved in the firewall's configuration. For security reasons we recommend to not save them.
You can review the result of the installation processes
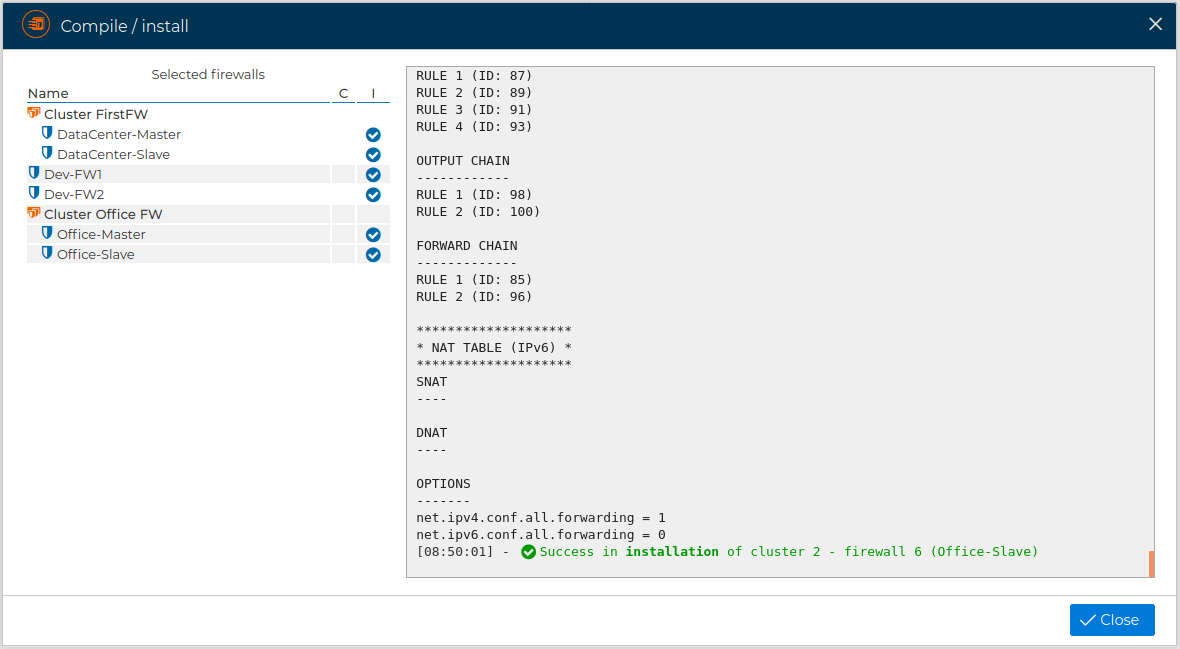
See also How to install the policy of a Firewall section
# Others actions
# Audit logs
From the firewall and cluster context menus you can open the Audit logs option. This opens the audit log viewer already filtered for the selected firewall or cluster.
For more information about the available filters, downloads, permissions, and post-install log review, visit Audit logs .
# Edit Firewall
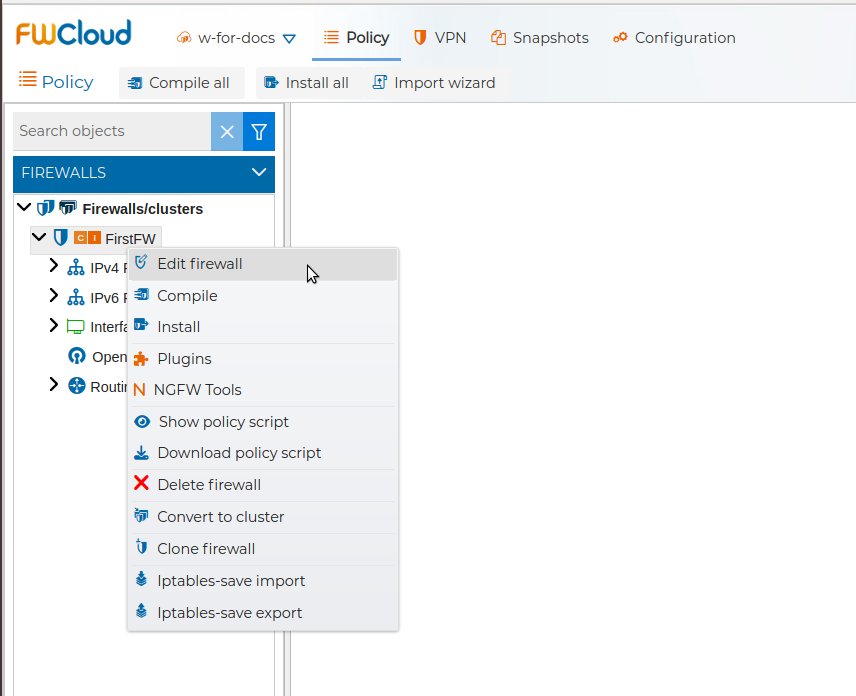
You can edit the settings of the firewall by double clicking on the name of the firewall or right click on it and select Edit firewall.
A new window with four tabs pops up. In the next subsections we are going to describe these tabs.
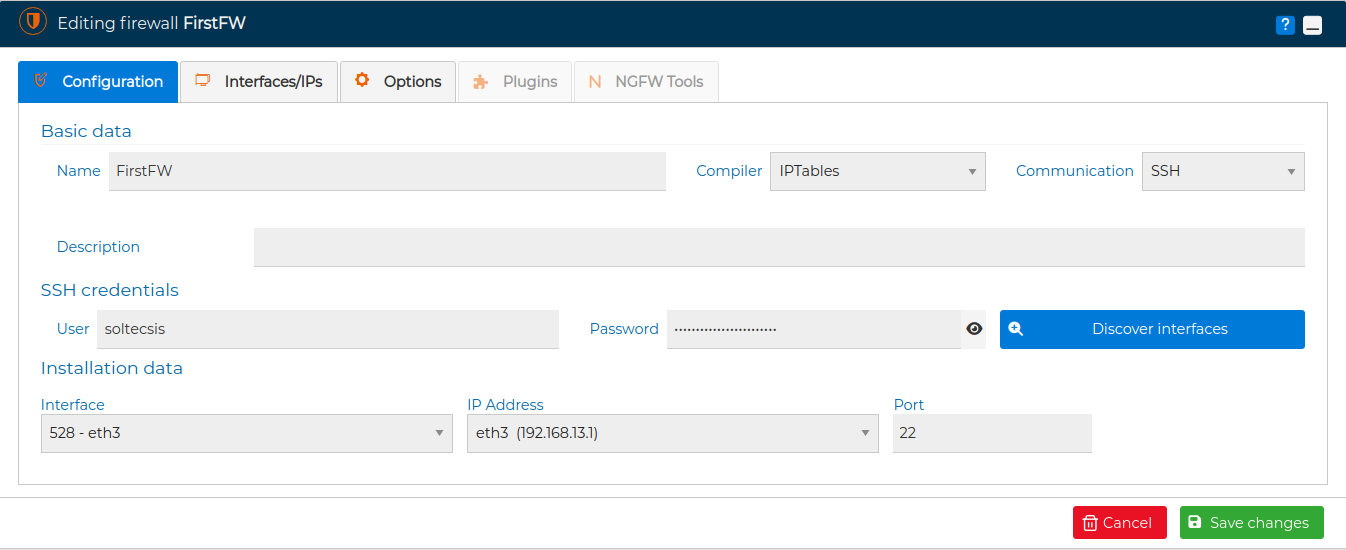
# Configuration
The first tab is named "Configuration". Here you can change the name of your firewall, add a description and choose the compiler is going to be used to generate the security policy. Currently you can choose among the two most popular formats in Linux distributions, the IPTables and NFTables formats. Also you can select the communication mode from SSH or FWCloud-Agent. If SSH is selected then you can change the username and the password used to access the firewall when installing the policy or the VPN configurations. If you go to FWCloud-Agent instead, you can select the protocol, HTTPS or HTTP, used with the agent and modify the API Key.
Next to this field you have the Discover interfaces button. You can use it to discover the interfaces and IP addresses the firewall has. FWCloud-UI will connect to the firewall and it will take you to the next tab showing the network information obtained. And finally in this tab you can select the interface, IP address and port to reach to the firewall. If the FWCloud-Agent is the communication method then you can also test the connection with the agent by pressing the Test button.
![Edit Firewall Tab 1]](/assets/img/edit_fw-form-iptables-agent.png)
# Interfaces/IPs
In the second tab, named "Interfaces/IPs", you can see a tree with all the network interfaces and IP addresses of the firewall or cluster of firewalls. If the firewall is being configured now it will only show the loopback interface until you perform a discover or manually add more interfaces. When hovering the mouse over an interface name, a pencil icon appears, if you click on it you can modify the properties of the interface or the IP address. In this tab there is also a handy utility to discover the the interfaces and IP addresses that actually your firewall has and copy them into the firewall configuration in FWCloud-UI. See Autodiscover section upper in this help.
# Options
In the third tab, "Options" you can set up several firewall options.
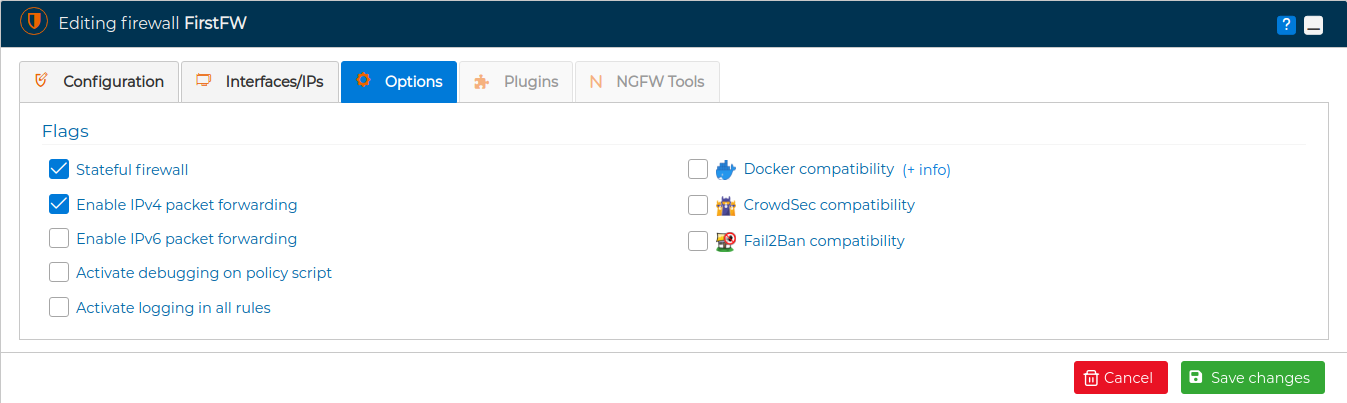
You can decide if you want a stateless or a stateful firewall. A stateful firewall is able to tract the state of the connections, so you can use the conntrack module and the ctsstate option in the secure policy rules. By default when a new firewall is created in FWCloud-UI the option Stateful firewall is set and the traffic belonging to established and related connections is allowed by the security policy. This option can also be set at rule level, visit Edit rule section.
Also you can enable or disable the firewall to forward traffic from one interface to another. By default it is enabled for IP version 4 and disabled for IP version 6.
If you are having problems installing the security policy on the firewall checking the option Activate debugging on policy script is helpful for troubleshooting. The code executed and the output of the policy installation script will be displayed.
If the firewall uses the IPTables or NFTables compiler, the Options tab also allows enabling optimized compilation. When this option is active, IPTables firewalls generate an optimized script based on iptables-restore and ip6tables-restore blocks, while NFTables firewalls load the generated policy through nft -f -. This is useful for large policies because the firewall can load many rules in fewer operations.
With Activate logging in all rules option the traffic of the packets that match the rules of the policy are registered in the syslog file of the firewall. Also a limit of 60 packets per minute is established. The record is prefixed with "RULE ID xxx" where xxx is the number of the rule that is being hit. Logging packets only for an particular rule is also possible, visit Edit rule section.
When we manage the security policy from FWCloud we have to take into account the rules introduced by third part programs like Docker, CrowdSec or Fail2Ban. Otherwise, when installing the policy from FWCloud, these rules would be deleted and only those that are in FWCloud at the time of compilation and installation would be applied.
Docker initially generates a set of security rules suitable for the containers it runs and the configurations defined for them. If we use FWCloudUI to manage the security policy of the server where we run these containers, the rules automatically generated by Docker are removed when loading the FWCloud policy. And vice versa, Docker will generate IPTables rules that are not included in the security policy defined through our FWCloud console.
The best option to avoid these conflicts is to disable the automatic generation of IPTables rules by Docker and generate the security policy that interests us from FWCloud-UI. For more information visit this link (opens new window)
The option Docker compatibility of this tab has a link +info (opens new window) that address to section of FWCloud web site giving more detailed information and an example showing how to manage the security policy from FWCloud for a server running two Docker containers.
Checking the CrowdSec compatibility option FWCloud-UI creates two new special rules that make use of the blacklist maintained by CrowdSec to block suspicious IPs. These rules are created on the INPUT chain and FORWARD chain for both IPv4 and IPv6 policy. They cannot be deleted. To eliminate them, simply uncheck the "CrowdSec Compatibility" box.
Next there is a short video using this option:
When we check the Fail2Ban compatibility option, a special rule is generated in the INPUT chain. It is a hook script rule that restarts the Fail2Ban service. Fail2Ban at startup reloads its configuration and reads the data from its database and creates the necessary rules in the security policy.
In this way the process is automated and Fail2Ban is operational even if we modify the policy and install it in our firewall.
The video below shows the use of Fail2Ban compatibility option:
# Dangerous rules detection
FWCloud provides automatic alerts when it detects that one or more rules defined within the security policy may compromise access control, be excessively permissive, or cause subsequent rules to have no effect. These situations may reduce the overall effectiveness of the security policy and lead to unintended behavior.
Such notices are intended to assist users in identifying rules that are incorrectly configured, incomplete, or no longer relevant. They are also useful for detecting rules that may have been unintentionally altered or left unfinished during previous configuration changes. By reviewing these alerts, users can ensure that the security policy remains consistent, effective, and aligned with its intended purpose.
This functionality can be enabled or disabled from the Options tab, either at individual firewall level or at firewall cluster level. This allows the warning mechanism to be adapted to the specific operational requirements of each deployment.
FWCloud supports two distinct alert levels. One level is used to highlight Warning level, which may weaken the security policy or introduce unnecessary exposure. The second level is reserved forCritical level, which are more likely to cause serious security issues or render other rules ineffective. This classification helps users to prioritize their review efforts and address the most significant risks first.
Both alerts are shown when compiling the security policy:
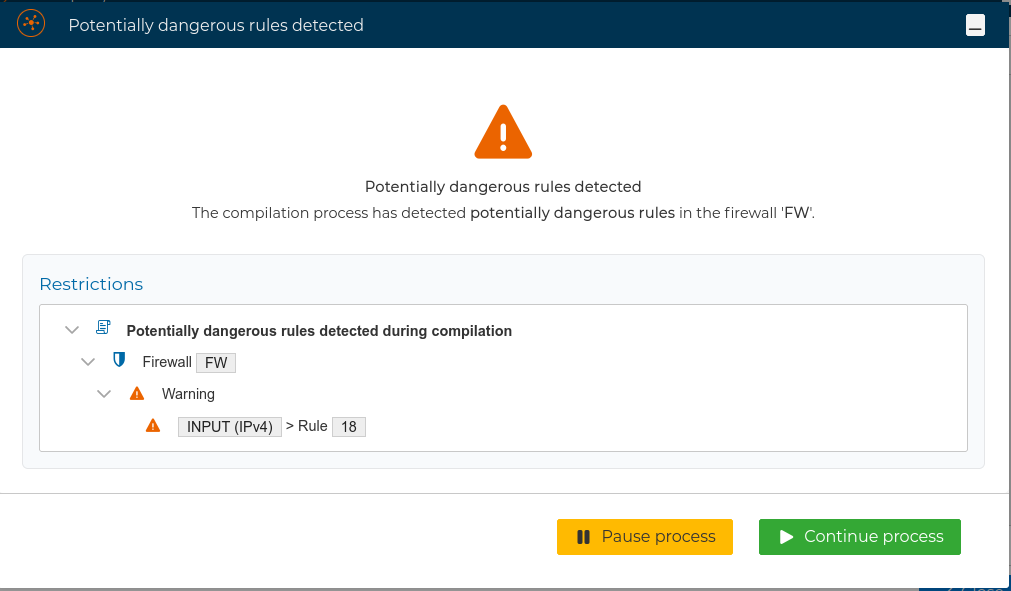
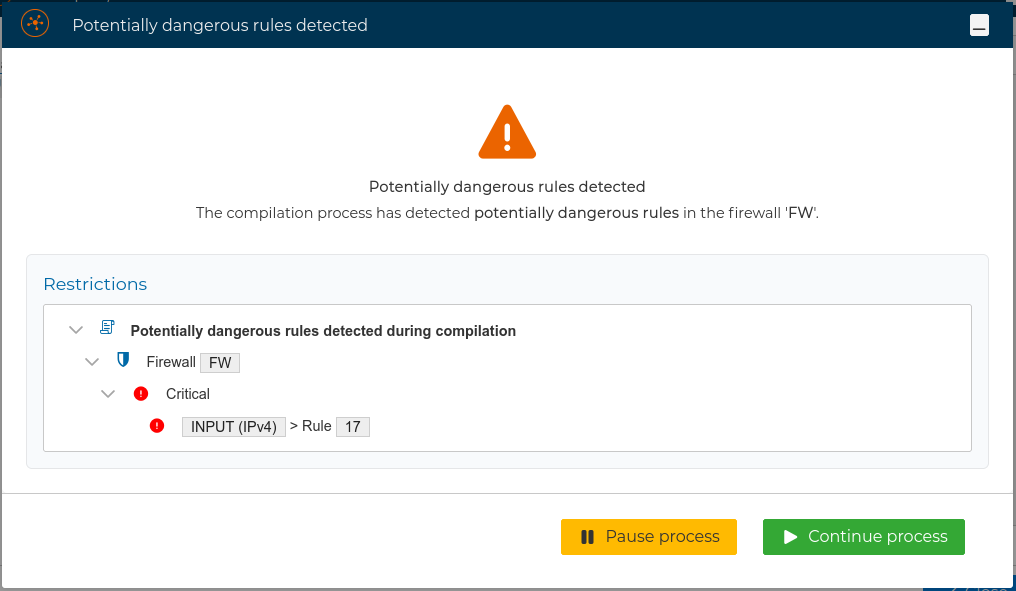
Alerts are displayed during the compilation of the security policy. Each alert identifies the specific rule or rules that trigger the it, enabling the user to clearly understand the source of the issue.
By double-clicking on an alert entry, direct access to the corresponding rule is provided, and the rules blinks for same seconds, allowing it to be reviewed or corrected where appropriate. Once the necessary changes have been made, the user may return, by clicking the ![]() icon, to the compilation process to continue with the next flagged rule, or click
icon, to the compilation process to continue with the next flagged rule, or click ![]() icon the to ultimately complete the compilation.
icon the to ultimately complete the compilation.
These alerts are advisory in nature and are not mandatory. If required, the user may choose to proceed with the compilation and subsequent installation of the security policy despite the presence of warnings, doing so at their own discretion and responsibility.
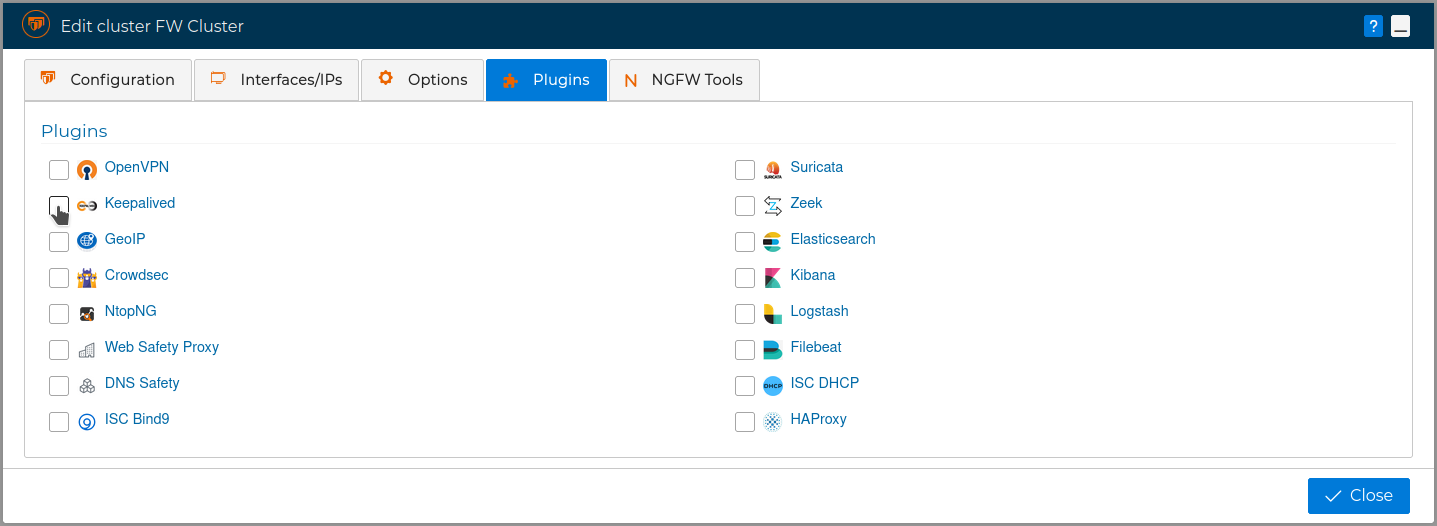
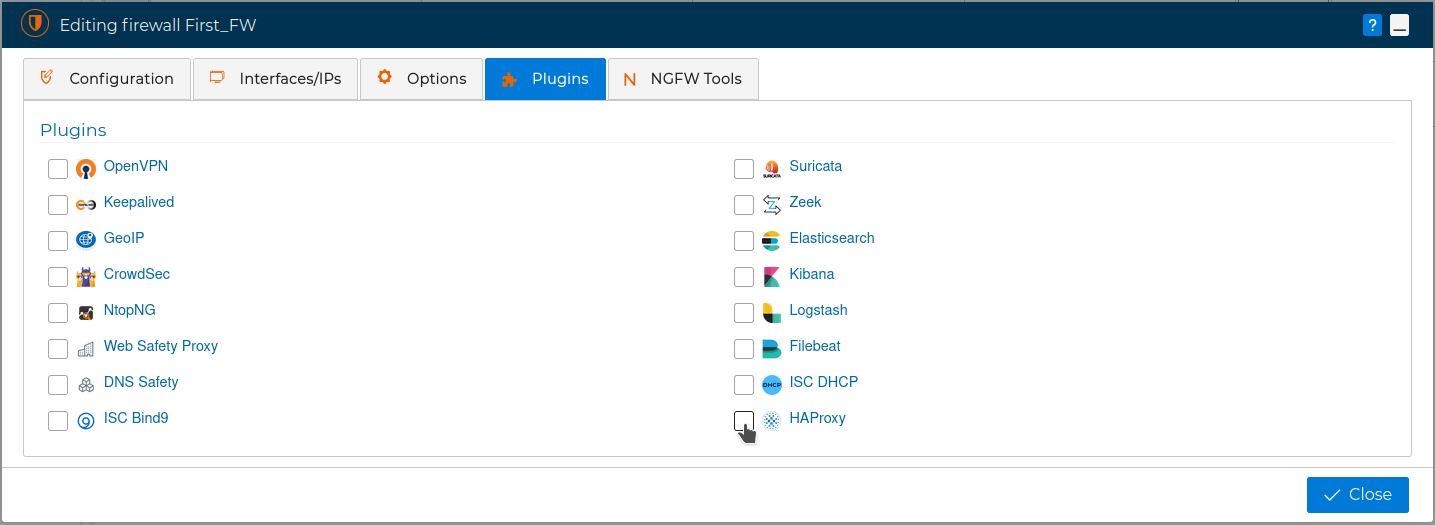
# Plugins
The fourth tab is called Plugins.

This tab will be active only if the communication method with the firewall, chosen in the first tab, is FWCloud-Agent.
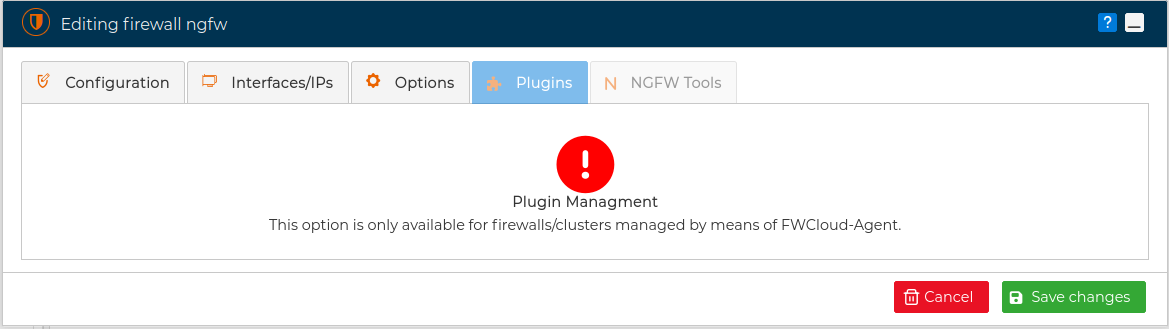
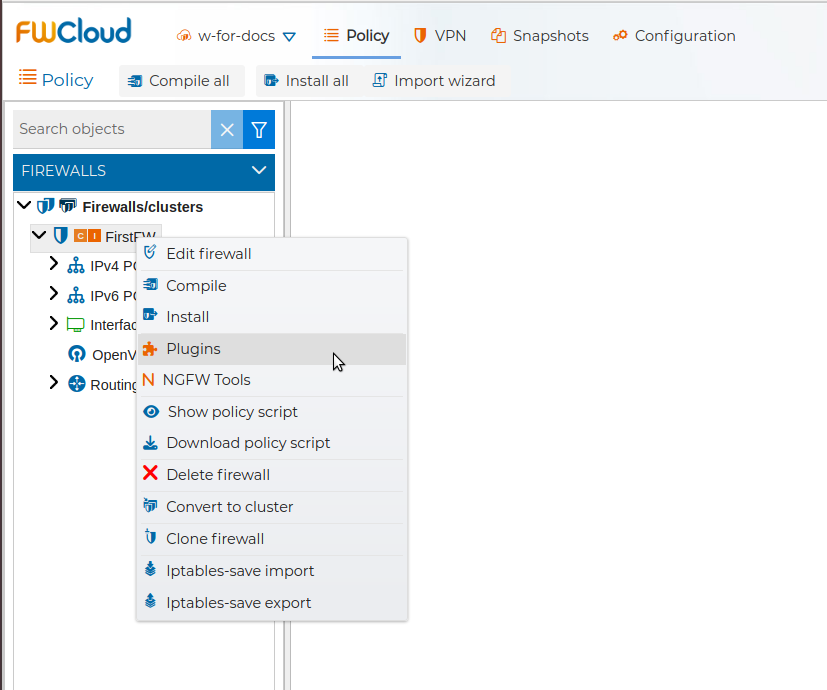
Also we can access the Plugins tab directly from the context menu of the firewall.
From FWCloud-UI we can control the installation of these security products to extend the functionality of the firewalls.
The description of the plugins included in FWCloud can be found in the Plugins section.
# NGFW Tools
The fifth tab is called NGFW Tools. Again this tab will be active only if the communication method with the firewall, chosen in the first tab, is FWCloud-Agent.
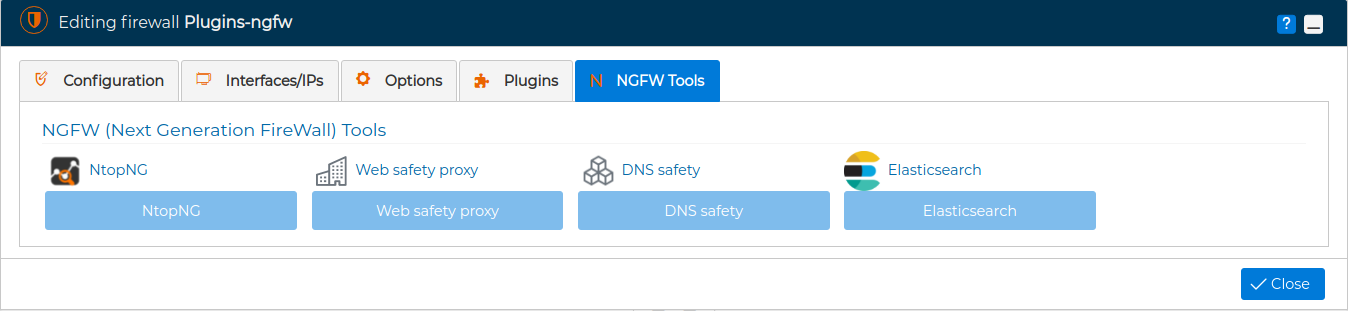
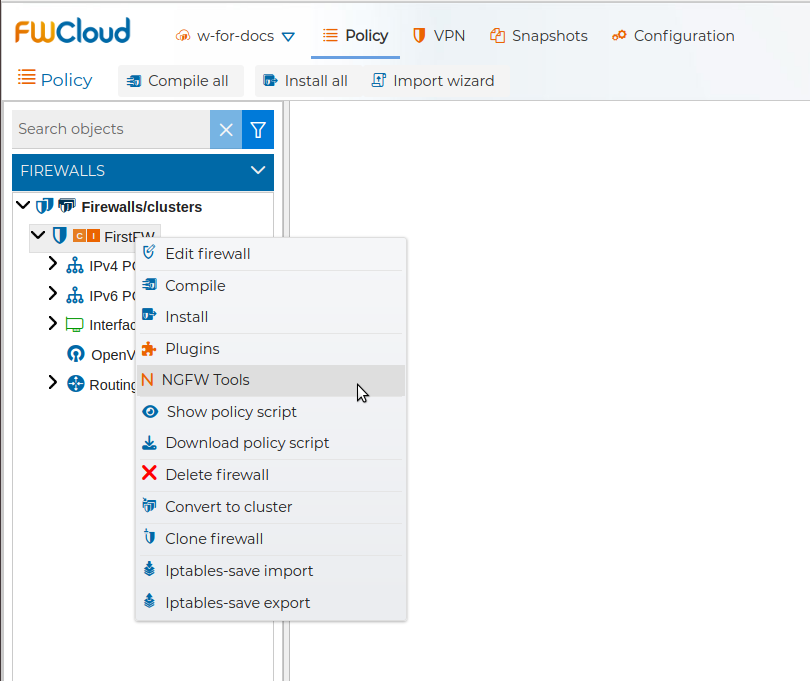
We can access the NGFW Tools tab directly from the context menu of the firewall.
From this tab we can access the administration of the NGFW features. By clicking on the buttons we will be redirected in the browser. For the buttons to be active, it is necessary to have previously activated the corresponding plugins described in the previous tab
# Edit a Cluster of Firewalls
You can edit the settings of a cluster of firewalls, like name, description or compiler by double clicking on the name of the cluster or right click on it and select Edit.
A new window with three tabs pops up. Note that now in the "Configuration" tab you can see the nodes that make up the cluster. Here you can change their names, the credentials to access them, and their interfaces, IP addresses and ports. Also you can completely remove a node by pressing the  button, or add more nodes by pressing the
  button.
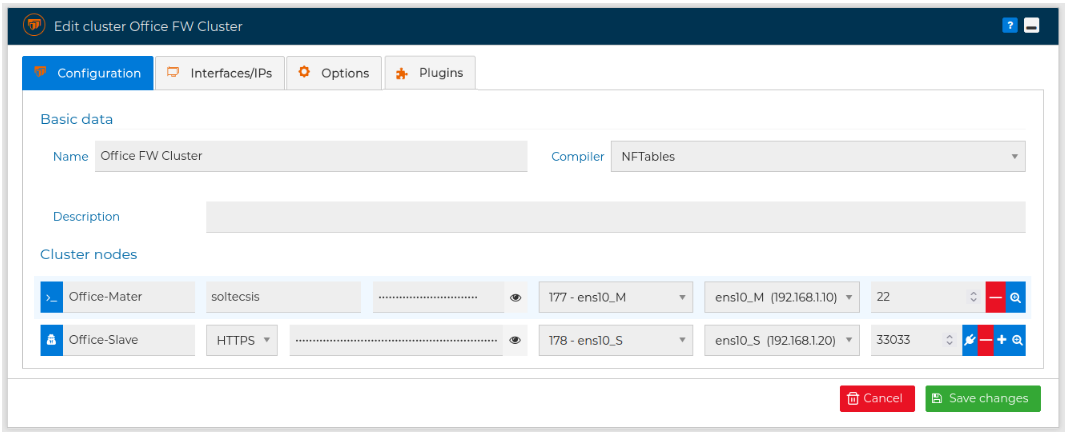
Although normally all nodes of a cluster have the same communication method, this is not mandatory and you can choose with method to user for each node, like in the image above. You can change the method by pressing the ![]() button or the
button or the ![]() button. If FWCloud-Agent is picked you can test the communication by pressing the
button. If FWCloud-Agent is picked you can test the communication by pressing the ![]() button.
button.
The interfaces of the nodes can be discovered by pressing the  button
In the second tab, named "Interfaces/IPs", you can see a tree with all network interfaces and associated IP addresses. You can edit and modify them quite similar as you have seen previously when editing a firewall.
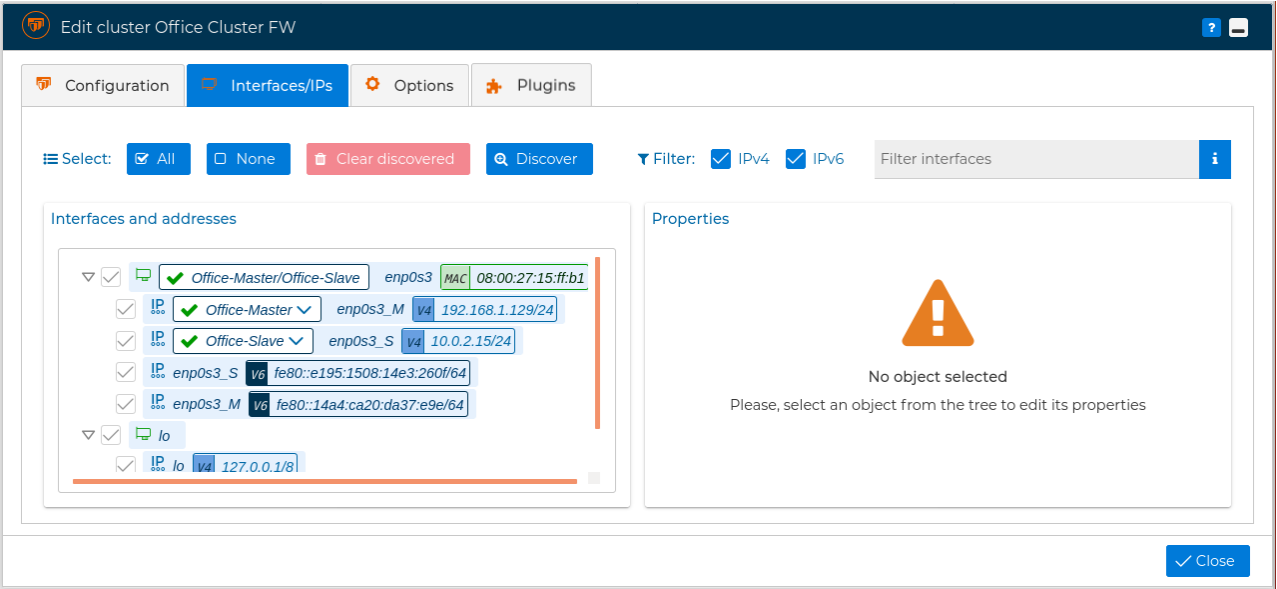
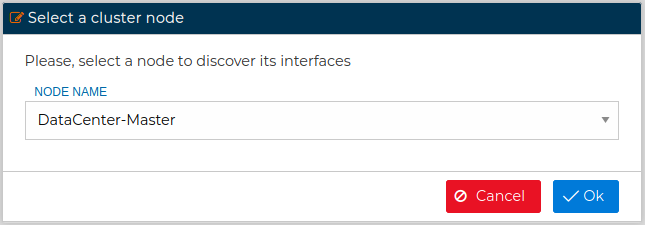
However the difference here is that when you press Discover button a new form is presented in order to select from which node of the cluster members you want to perform the discover
In the third tab, "Options", you have the same options you have for individual firewalls explained before. This the same for the fourth tab, "Plugins".
For clusters that use the IPTables or NFTables compiler, the Options tab also includes optimized compilation. IPTables clusters use the same optimized iptables-restore based mode used for individual IPTables firewalls, and NFTables clusters use the optimized nft -f - based mode used for individual NFTables firewalls.
# Policy script
The security policy is installed on the routers through a script. From the FWCloud-UI you can view and download the content of this script.
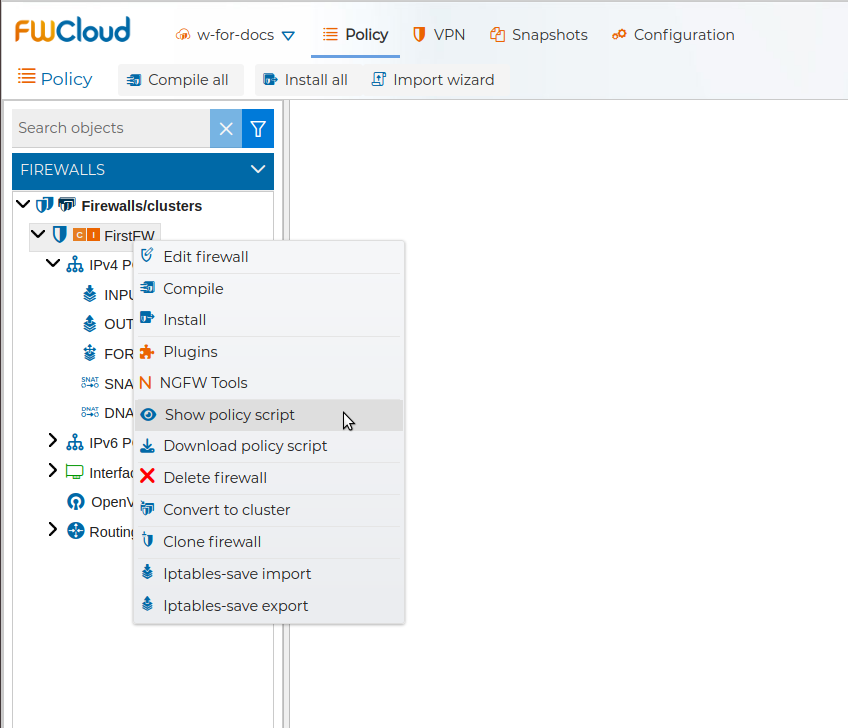
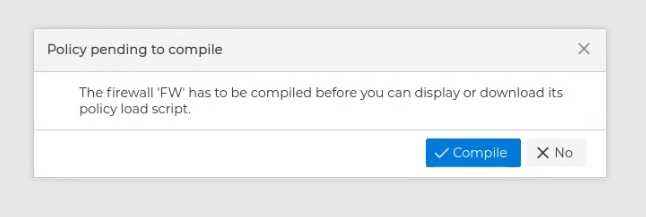
The script is created or modified every time the policy is compiled. If the firewall has never been compiled you will get a warning when you try to display the policy script
Right after the compilation of the policy has finished you can display the policy script

A popup windows showing the policy script is displayed
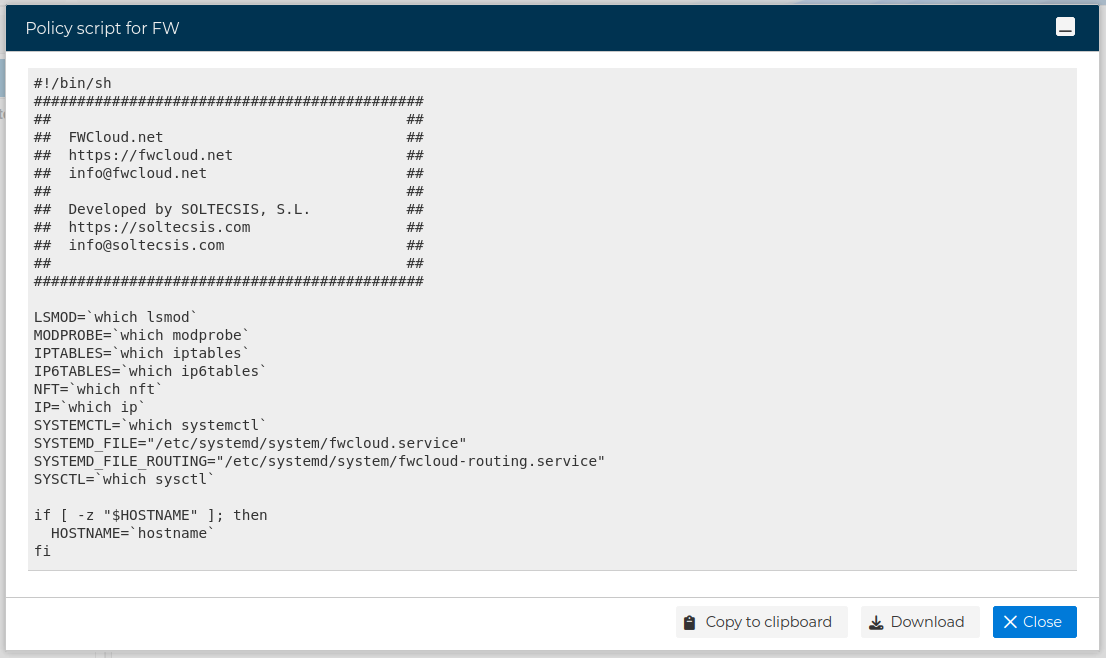
From this windows you have the option to copy it to the clipboard or download it as a text file.
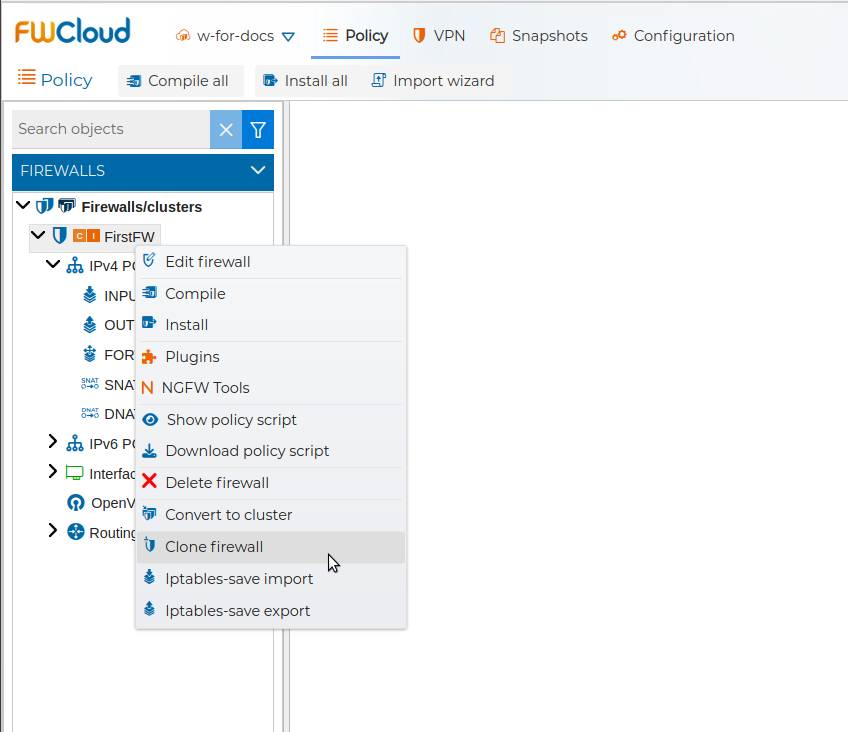
Also from the context menu of the firewall you can download a copy of the policy script.

To be able to download the script the firewall has to be compiled previously.
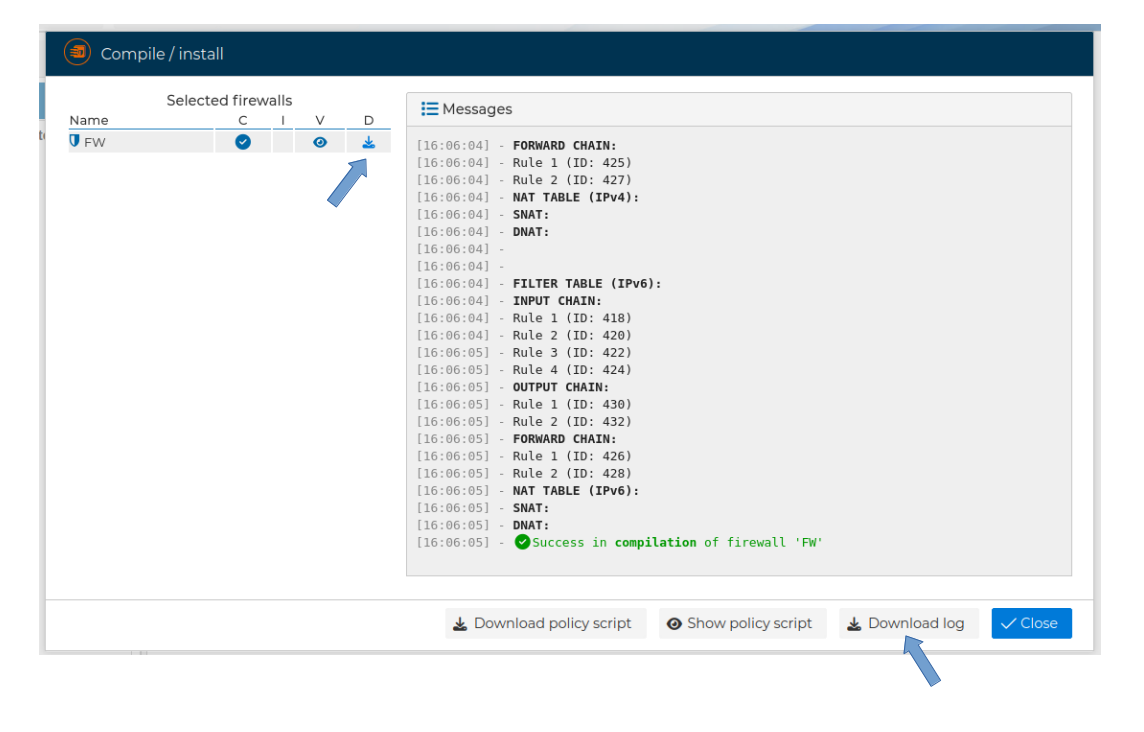
You also have the option to download the script immediately after the compilation has been done
Next you have video showin this feature
# Clone Firewall
If you are going to install a new firewall and it will have several similar characteristics and features to another one, you can make a clone of the actual firewall and configure the different parts to fit your new firewall.
This will ask you to name the new firewall and will create a copy.

# Convert to Cluster
In order to have HA you can a have a cluster of firewalls. In FWCloud-UI you will manage the policy rules and the VPN connections for the cluster, although you can set specific rules that only affect to particular node of the cluster. If you have been using a firewall in FWCloud and now it belongs to a cluster you can convert it into a single node cluster.
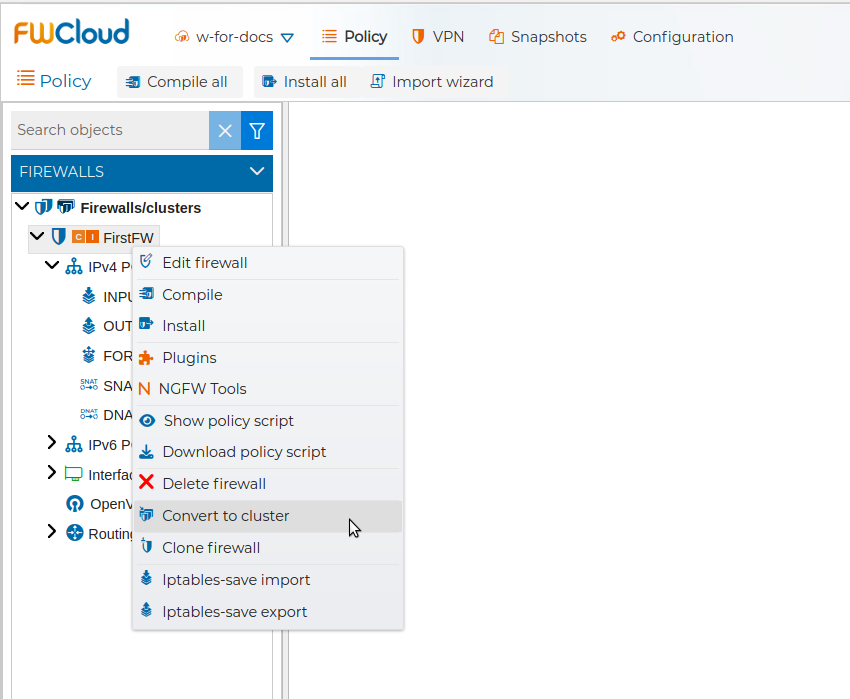
You will need to confirm the action.

It will be converted into a cluster of firewalls with only one node. You can edit the properties of the cluster and add the rest of nodes.
Also a cluster of firewalls can be converted into a firewall if needed.
# Delete Cluster
You can remove a cluster of firewalls from FWCloud-UI by means of the corresponding menu option.
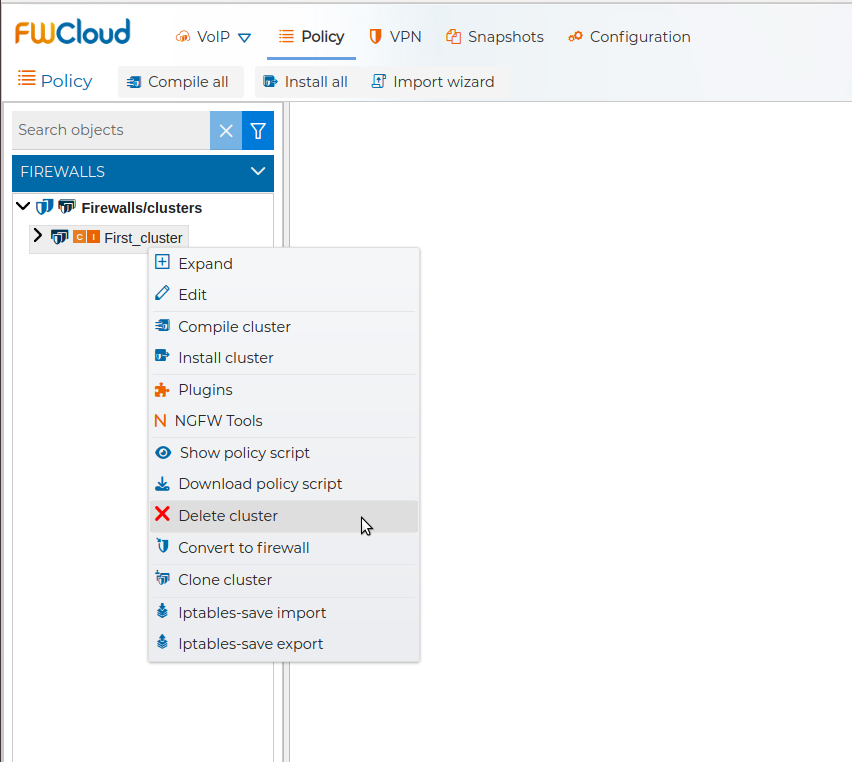
It requires confirmation.
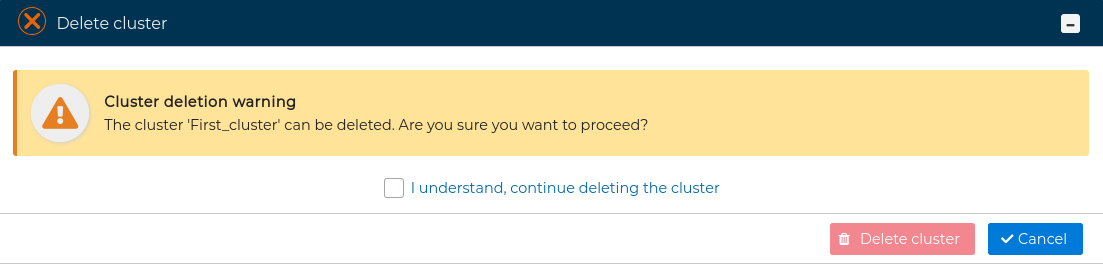
WARNING
If any of the cluster objects (interfaces, IPs, VPNs, etc.) are in use by other firewalls/clusters policy, it will not be possible to remove it and an error message will be displayed
# Delete Firewall
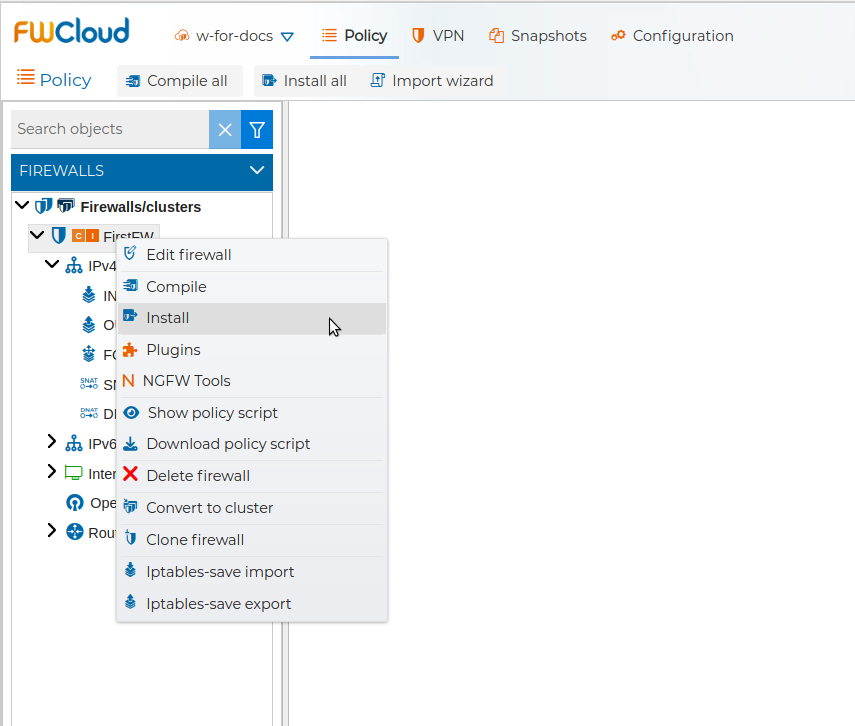
You can remove a firewall from FWCloud-UI from the contextual menu.
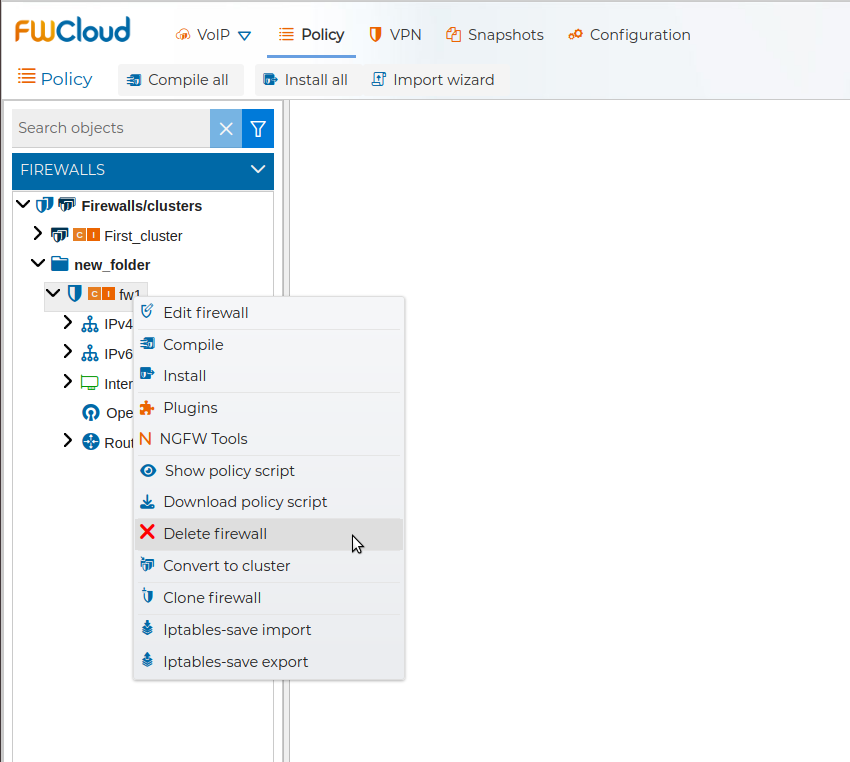
It requires confirmation.
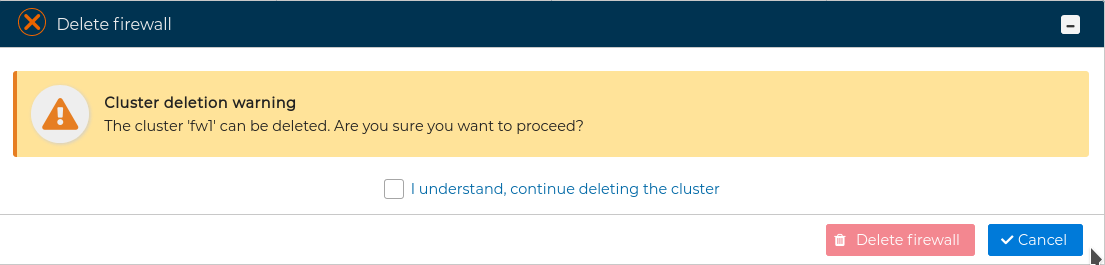
WARNING
If any of the cluster objects (interfaces, IPs, VPNs, etc.) are in use by other firewalls/clusters policy, it will not be possible to remove it and an error message will be displayed
# Import / Export
# Import wizard
FWCloud-UI allows importing the secure policy from other firewalls platforms based in Netfilter/iptables. The recommended way to import a firewall is using the Import wizard.
You can invoke this wizard from the contextual menu of "Firewalls/cluster"
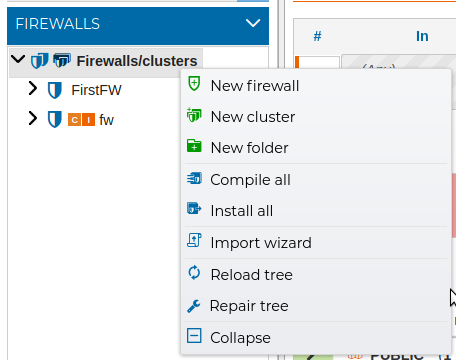
or pressing the upper button Import wizard

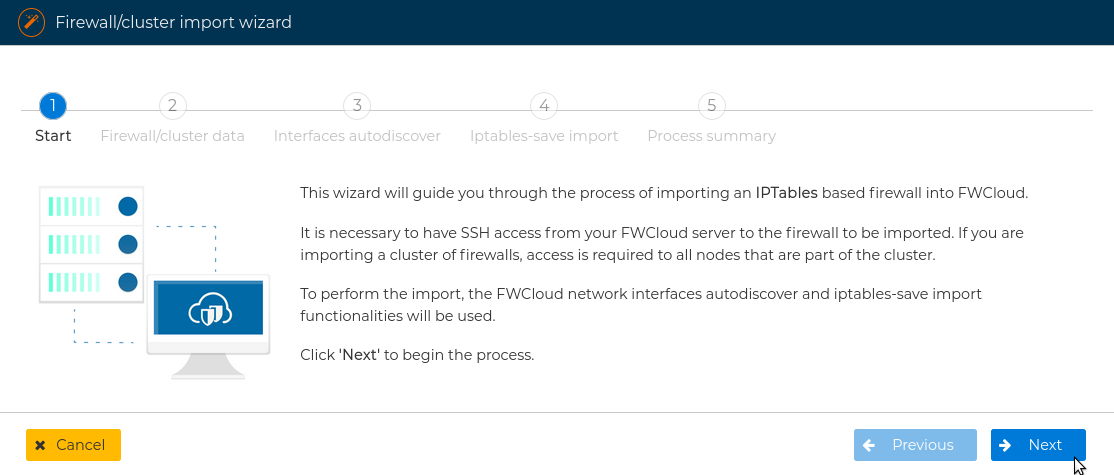
This wizard will guide you to all the necessary steps to create a new firewall or cluster of firewall importing the policy from another firewall or cluster, but also importing the necessary objects to FWCloud-UI infrastructure. It will connect to the firewall to be imported using SSH. It is necessary that FWCloud-UI can have root access to the firewall.
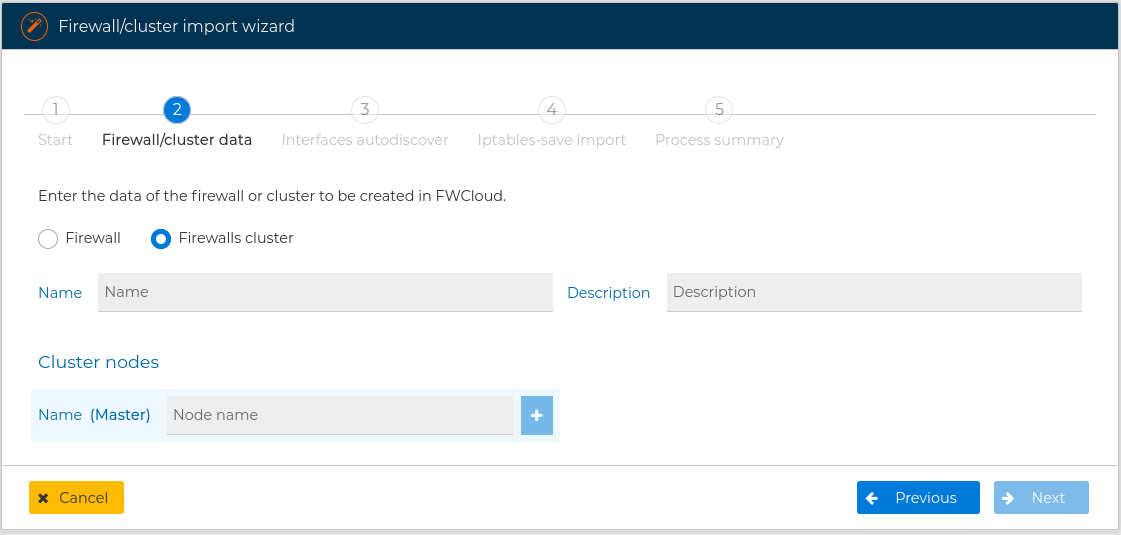
You need to specify if you are importing from a firewall or from a cluster of firewalls, and write the name of the new firewall or cluster
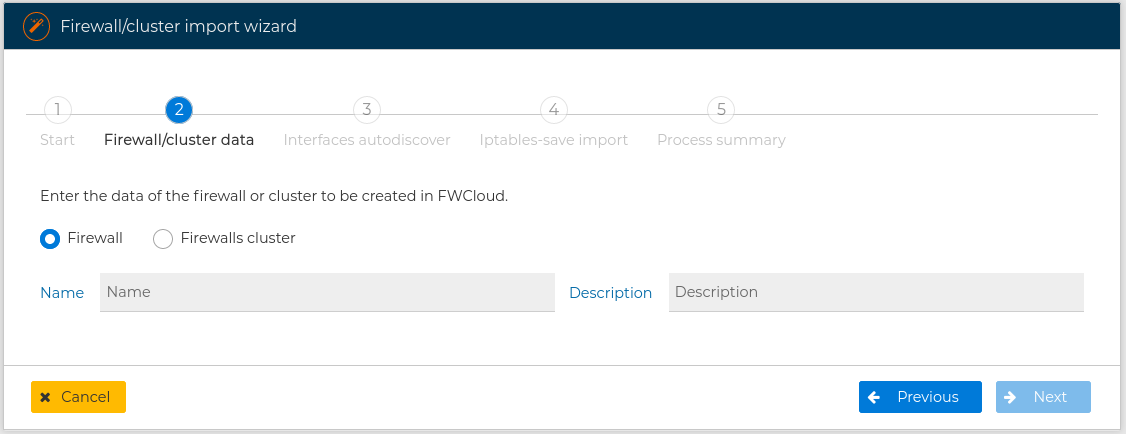
If you are importing from a cluster, you also have to provide the name for any of the nodes of the cluster. The master node name is required. You can add as many nodes as your cluster have pressing the button. After adding a node if you want to remove just press the button next to its name.
Next you have to provide the IP address, the username and the password to access the firewall you are importing from. If you are importing from a cluster you need to provide the address and the credentials for each node.

When using SSH remember the user needs to be able to execute privileged commands in the remote firewall to collect the necessary information, or use FWCLoud-Agent method:
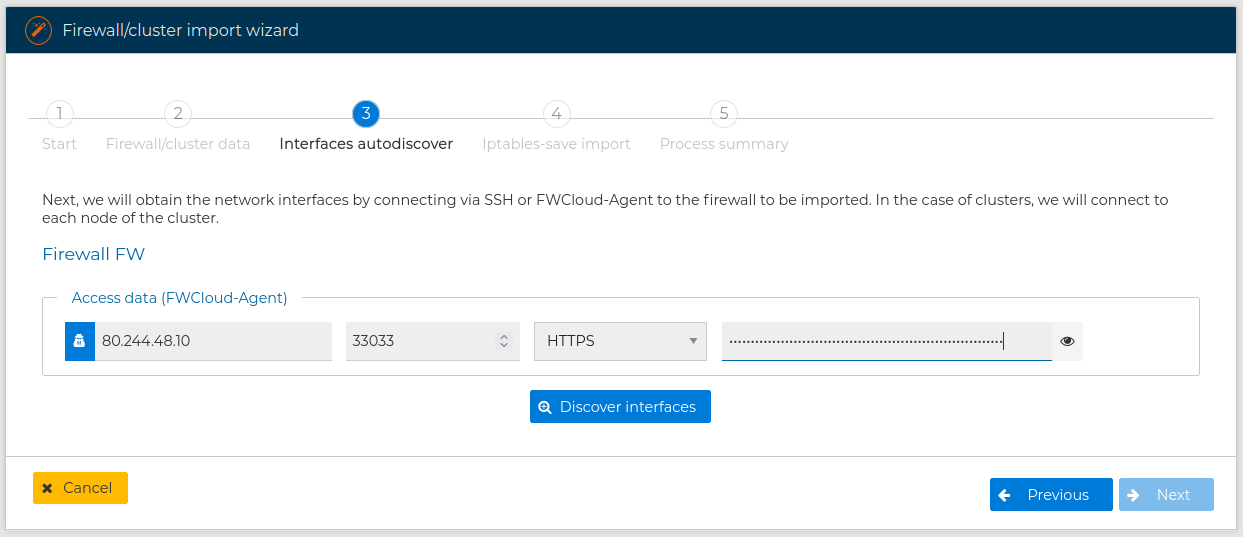
and press Discover interfaces button.
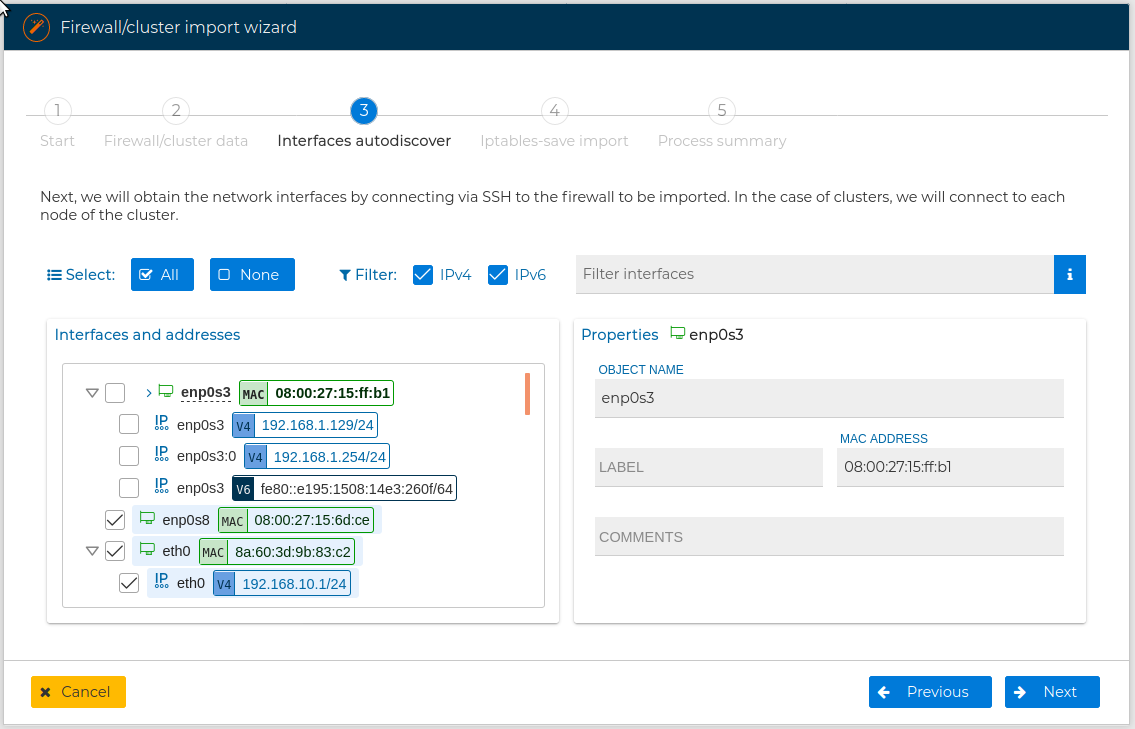
FWClouds connects to the remote device and gets the name, the MAC and IP address (for IP version 4 and version 6) for each interface it has. By doing this FWCloud-UI is able to create the new interfaces in the new firewall you are creating and use them in the policy rules. You are presented a form with the collected information and you can select with interfaces and IP addresses you want to be included in the new firewall. For more information about this process review Autodiscover section upper in this manual.
Next you need to confirm the action. If you do the wizard will proceed and you can no go back in the wizard or cancel the action, although onces finished you always can delete the new created firewall or cluster if you regret of the import.

The next step is a summary of the import and a warning that the security policy should always be reviewed before installing it, as this is an automatic process.
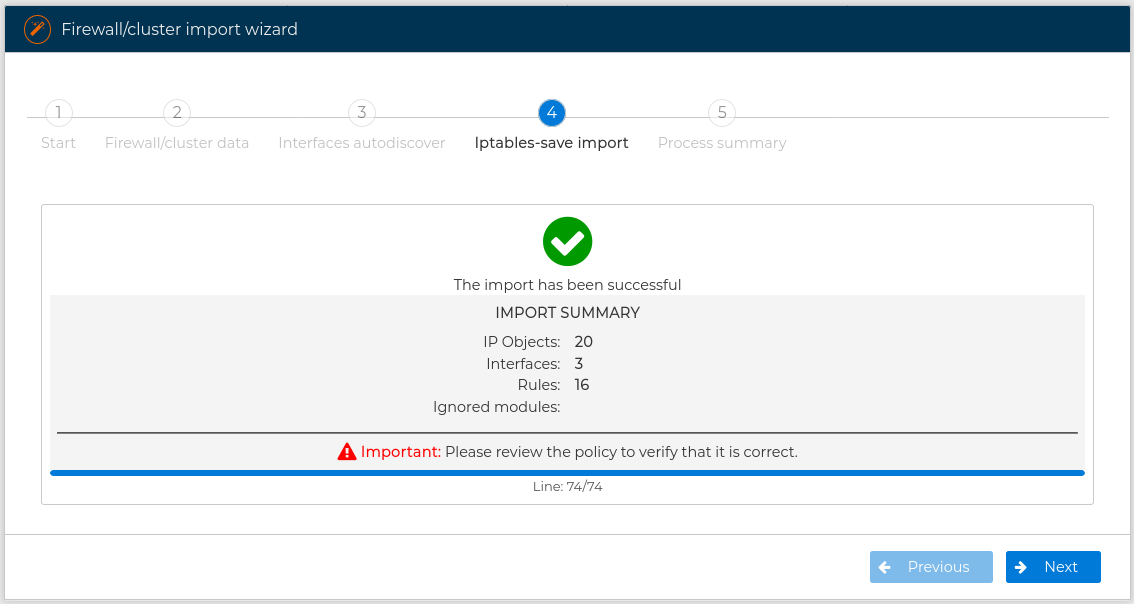
If no problems occurs during the process the final form is displayed
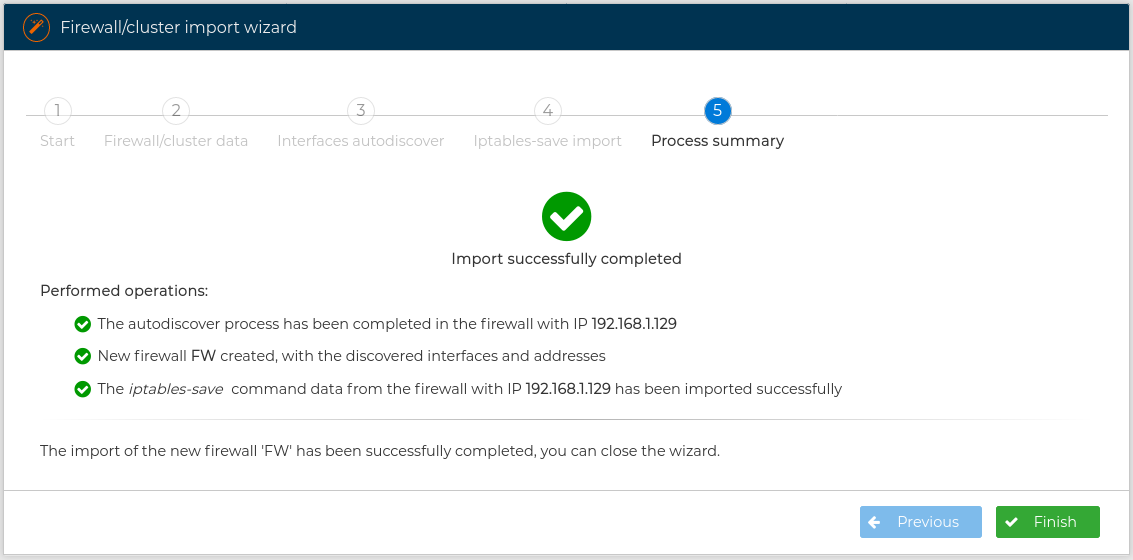
If you have imported from a firewall or cluster of firewalls created using FWCloud-UI all the visual features that FWCloud-UI has, like the background color of the rules or the grouping of rules, will also be included in the new firewall or cluster.
In the next video you can see all these concepts about Import wizard when importing a firewall:
Now we show another example of using this wizard but this time we are going to import a firewall cluster:
# IPTables-save import
If you now what you are doing you can import the firewall manually. In this case create first the new firewall or cluster and then select iptables-save import from its contextual menu.
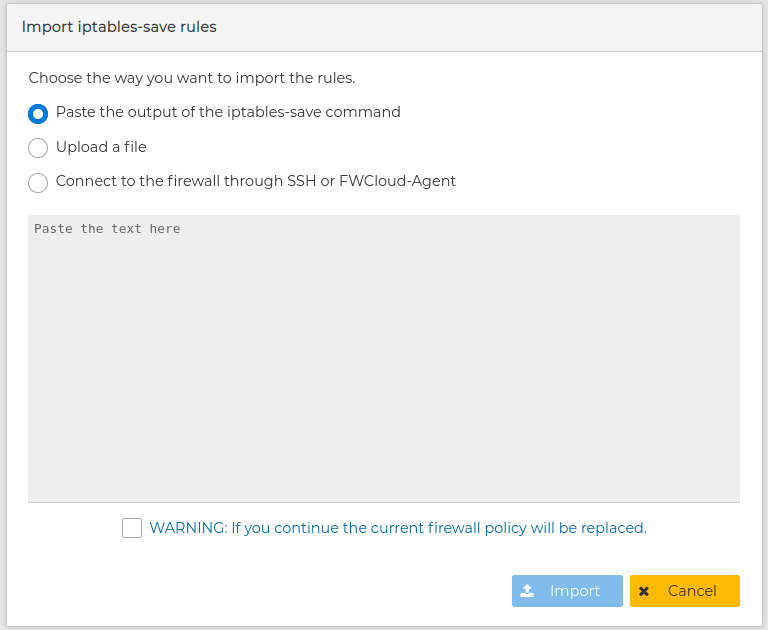
You will be presented a form with options to choose the way to import. This form changes dynamically according to the options you go for.
You can paste the output of the command iptables-save command executed in the remote devices. This is useful if you do not have access from the FWCloud-UI computer to the remote firewall.
You can upload a file you get as a result of a previous export.
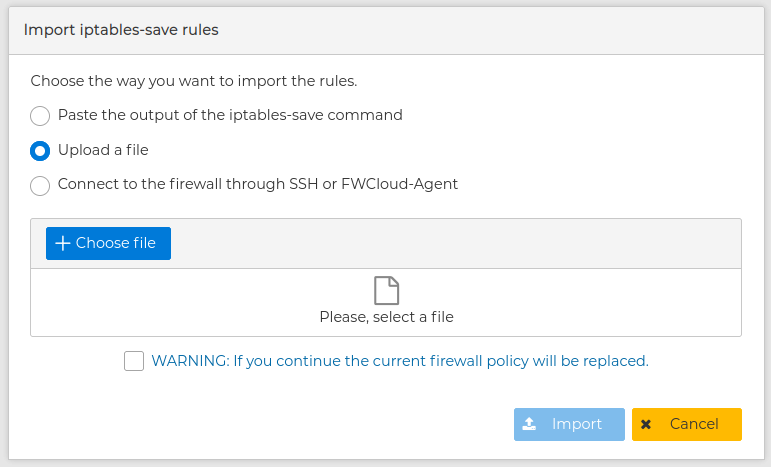
And you can make FWCloud to connect to the remote devices as it was in the case of the use of the "Import wizard"

In all three cases you need to agree the warning that the current security policy of the firewall or cluster is going to be replaced by the new one.
# IPTables-save export
The entire secure policy can be exported. From the contextual menu of the firewall select Iptables-save export and provide the IP address and credential of the firewall you want to export
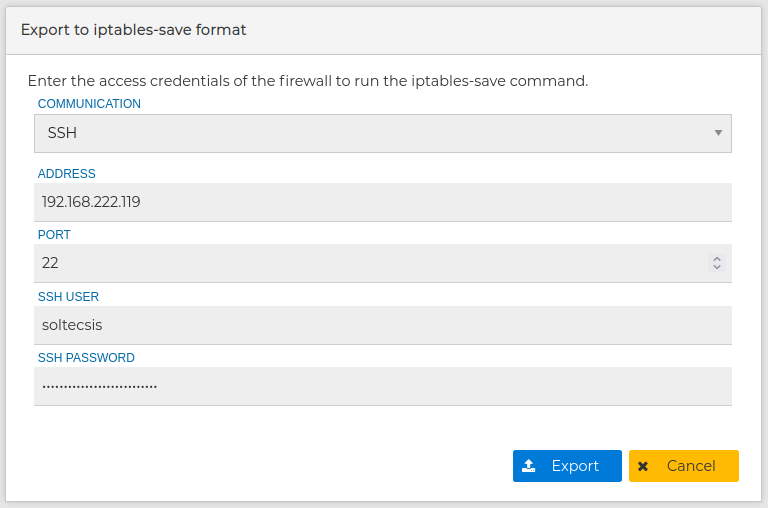
You can copy the result to the clipboard in order to quick import it in another FWCloud firewall or download it to a file to save it in a secure place and used later on.
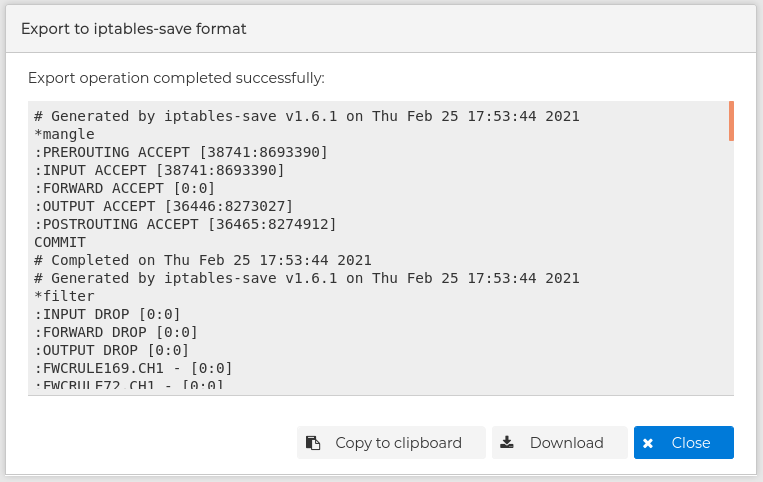
When exporting from FWCloud-UI the visual features are also included, but the generated file can also be used in any iptables-save format compatible firewall.
# System
Another important feature of FWCloud is the ability to control system services from the web console.
If the target firewall's operating system supports Systemd, we can use the systemctl tool without opening the terminal.
To illustrate this feature, we can review the complete lifecycle of OpenVPN service, which can also be installed from FWCloud as an add-on.
From the Policy panel, if we unfold the "System section", we can manage three widely used plugins: ISC-DHCP, Keepalived and HAProxy.
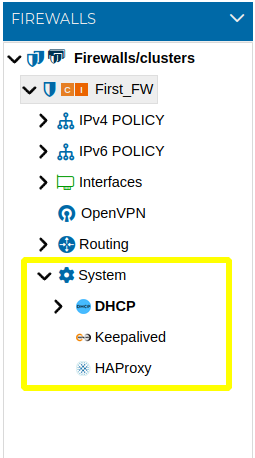
To known how these services can be installed from FWCloud please review Plugins section in this manual.
The following section describes how to create configurations for the ISC-DHCP, Keepalived, and HAProxy services. In accordance with the FWCloud configuration model, each service configuration is defined through a set of rules that collectively form the service policy.
When a service is deployed on a firewall cluster, FWCloud allows administrators to specify, at the rule level, the cluster node on which each rule is applied. This provides granular control over service behavior across the nodes that make up the cluster.
# DHCP
It is often common that some of our firewalls also handing IP addresses to the equipment of out networks. We can install ISC-DCHP server from the Plugins tab.

Let's see how we can manage all the ISC-DHCP configuration steps from FWCloud. For this service the configuration is rule-based.
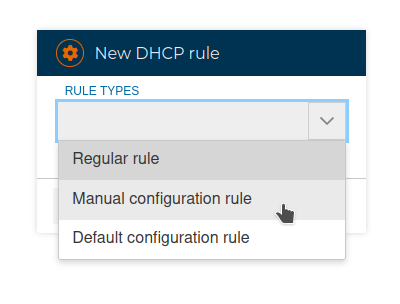
We have 3 types of rules we can use:
# Regular rules

A regular rule consists of three fields: network, range and router To compose a rule we only need to drag and drop the appropriate objects If any of these fields is empty the rule cannot be saved.
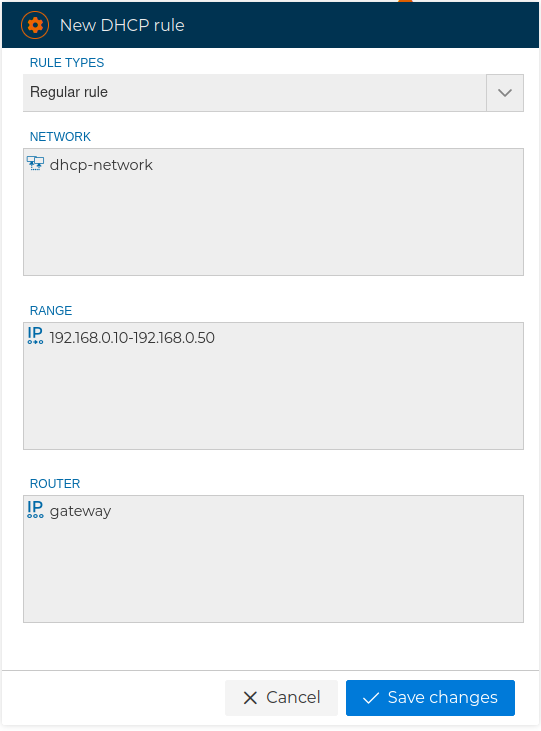
We can use any network for the first field, a range of IP addresses, which will be used to offer free IP addresses to the devices that request them and finally the IP address of the router that the devices will get as a gateway.
# Manual configuration rules
Allow us to freely insert any kind of configuration line. It also can be used to add comment lines.

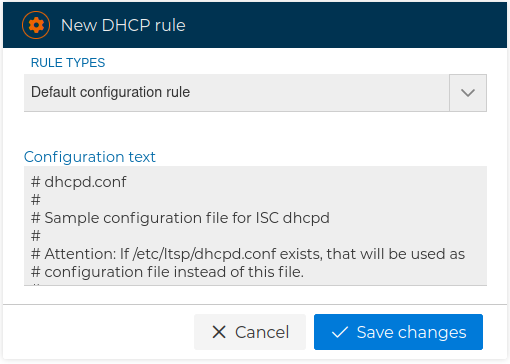
# Default configuration rules
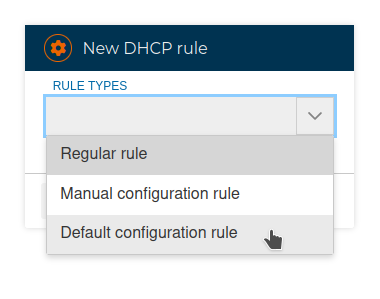
It is mainly use to add the default settings to the configuration file.
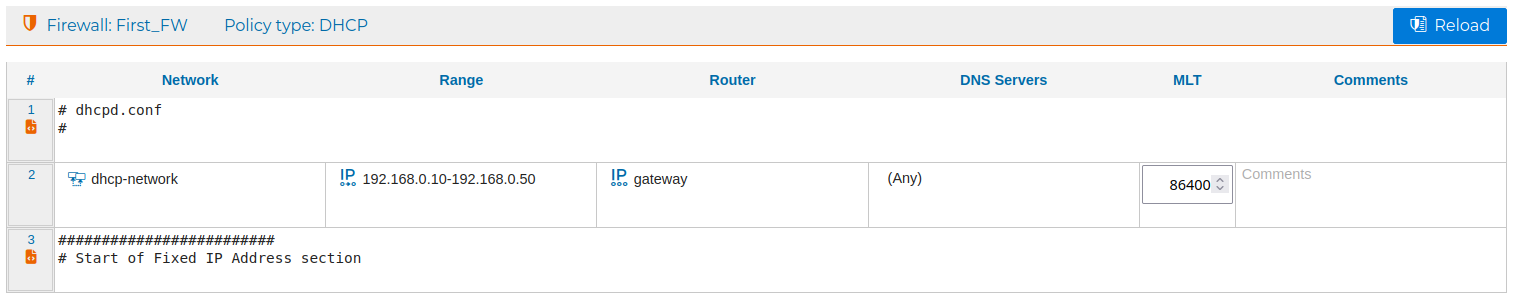
Once rules are added, they can be edited to fit our needs. We can use all of FWCloud's visual features for policies, such as grouping rules or coloring them.
This is what the DHCP policy will look like after creating the example rules mentioned before:
When configuring security policies on a firewall cluster, FWCloud provides the option to specify, at the rule level, the cluster nodes on which each rule will be applied. This allows administrators to control how policies are distributed across the cluster.
By default, the selected option is “All nodes”, which applies the rule uniformly to every node in the cluster unless explicitly configured otherwise.

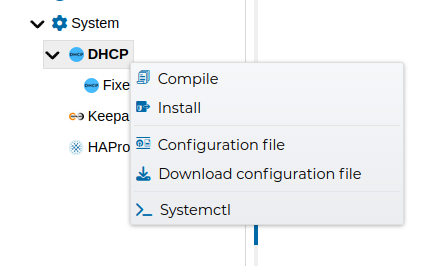
The rules can be compiled and installed from the options of the context menus.

From the system section of the firewall tree we can make the DHCP server always assign the same IP to a given network interface. Fixed IP address assignment is done based on the interface's MAC address.
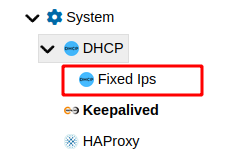
And we create a new rule for that:
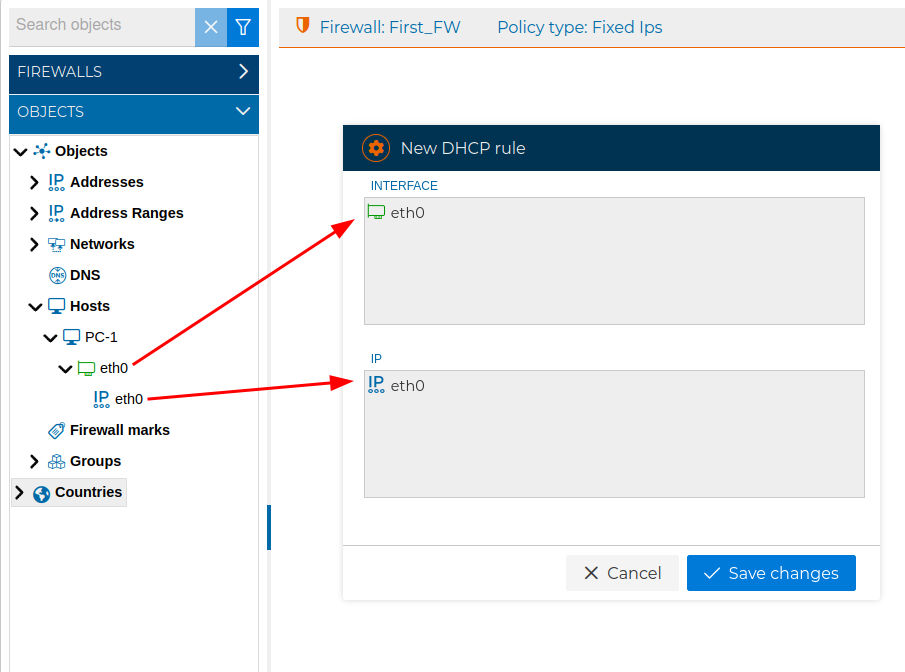
Next we show a fixed IP address rule in the DHCP policy:

In the case we are composing the policy for a a cluster of firewalls we can choose in which node the rule will be applied, normally in all of them:

The whole DHCP policy can be compiled and installed from the context menus.
The Fixed IP address section always goes at the bottom of the configuration file.
On our YouTube channel we have a video showing a small demonstration of the installation and configuration of a DHCP server
# Keepalived
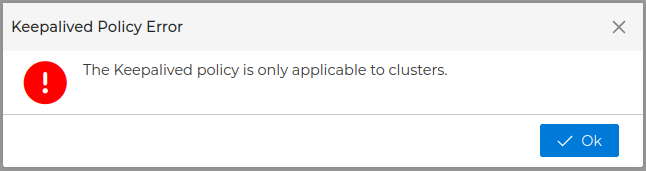
Another add-on we can manage form FWCloud is keepalived.
It should be noted that it is only configurable in clusters, if we try to configure it in a firewall we will receive the following message
When keepalived is installed, at the nodes of a firewall cluster, the installation process creates some configuration templates in /etc/keepalived directory:
Keepalived configuration files
| Example file | |
|---|---|
| keepalived.conf.FWCLOUD.MASTER | For the master node |
| keepalived.conf.FWCLOUD.SLAVE | For the slave nodes |
| StateChange.sh.FWCLOUD | Script (all nodes) |
We can use these files as a starting point for the configuration file that should be named keepalived.conf
The configuration calls the StateChange.sh script where we will define the actions we want to occur when the state of the cluster nodes changes, for example adding or removing a route.
The floating IPs addresses that will be set up on the node with the MASTER role are controlled directly by the keepalived service and it is not necessary to include any action in StateChange.sh.
The configuration can be defined from FWCloud using rules. As before we have 3 types of rules:
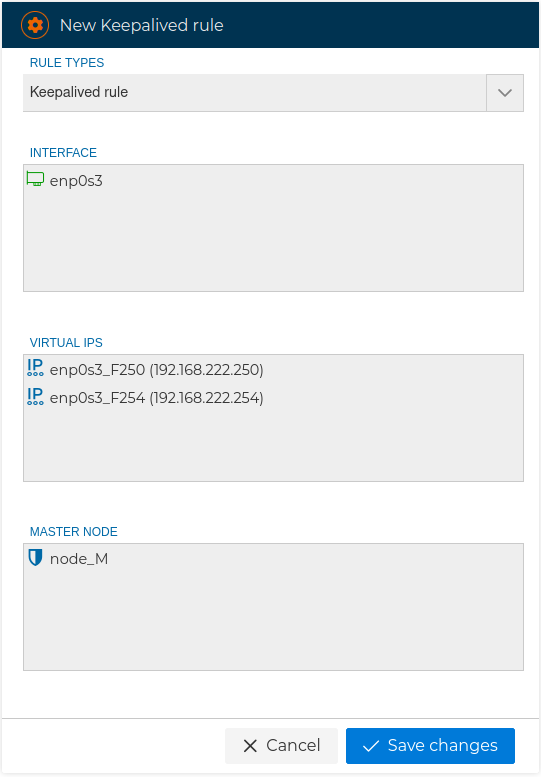
# Keepalived rules
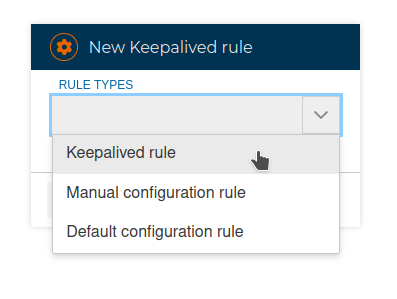
This is where we indicate the floating IP addresses that will be active on one node or another depending on the role they have
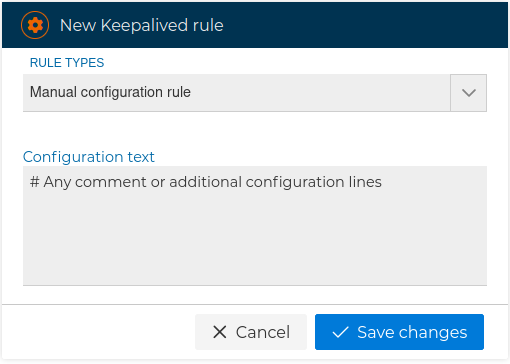
# Manual configuration rules
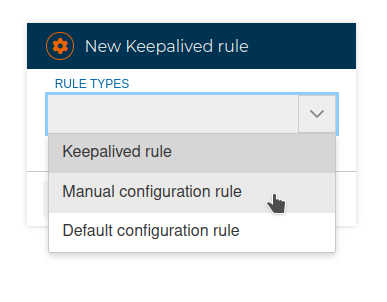
They allow us to freely include any configuration or parameter that we want to put in the configuration
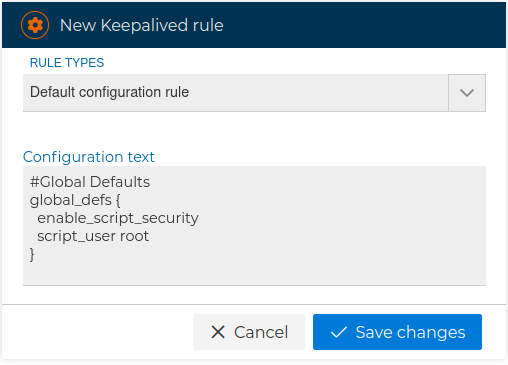
# Default configuration rules
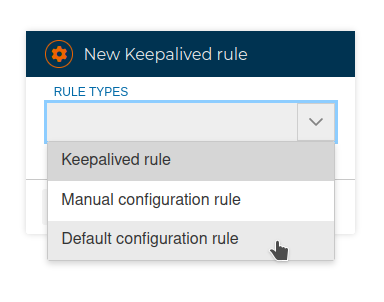
This type of rules includes the initial global configuration of the service. Generally we will add this rule to the beginning of the keepalived policy.
# HAProxy
Another useful service is HAProxy. It is used for load balancing and high availability of applications and web services.
The Plugins section details how to install it.
Also in the Plugins section there is a video showing the actions during the life cycle of this service.
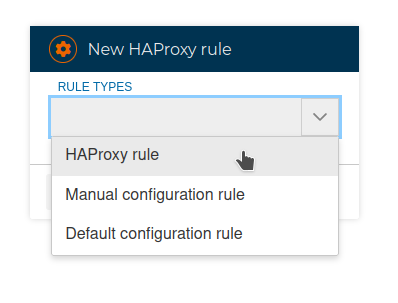
From the Firewall tree we can create the HAProxy policy, as before, based on rules. Again we also have 3 types of rules we can use:
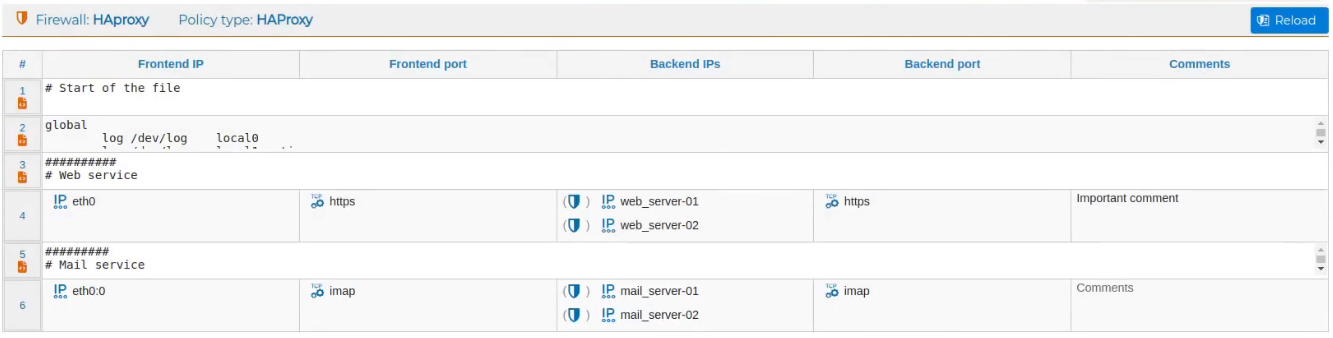
# HAProxy rules
These are the rules that allow us to balance services or applications.
This type of rules requires 4 fields: The IP address where the service listens and the port, as well as the IP address or addresses to which incoming requests are redirected and their corresponding ports.
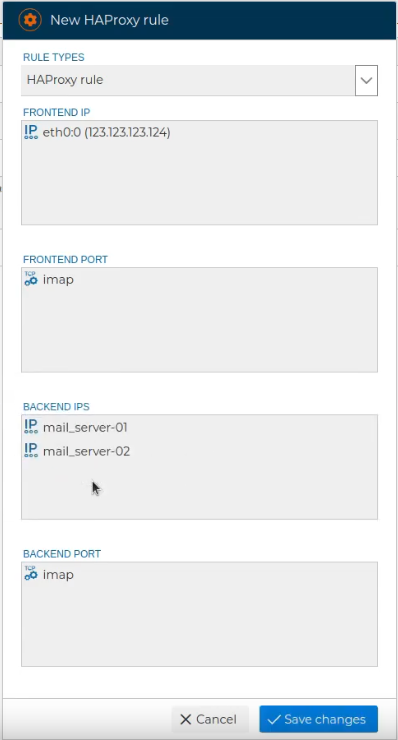
Once the rule is created, we can add a comment that clarifies its purpose.
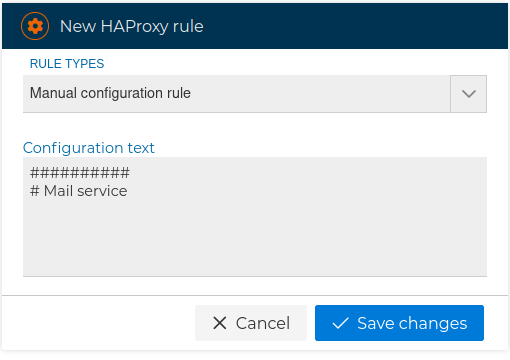
# Manual configuration rules
They allow us to freely add any parameters, advanced settings or just comments.
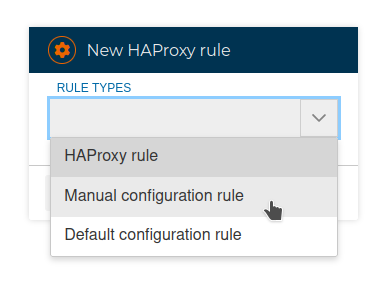
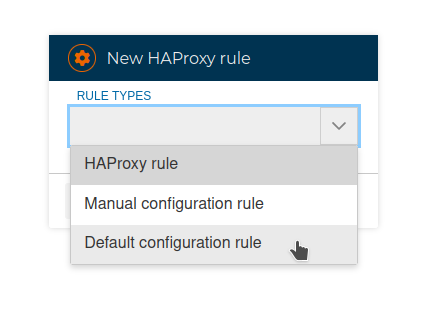
# Default configuration rules
They add initial configuration necessary for running the service.
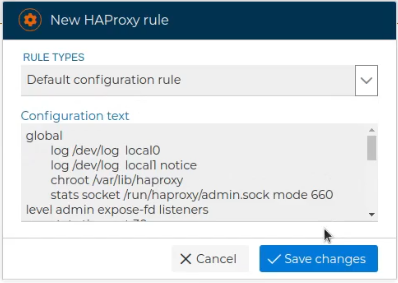
These can be edited and modified to customize the configuration
We can add as many rules as we need for the services we want to provide through HAproxy.
To see how the rules would look in the configuration we can compile them individually or all together.
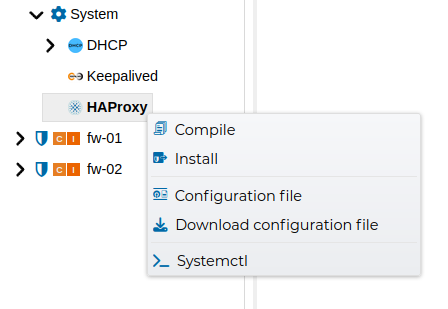
We can see the file with all the configuration and download it to have a backup copy.
If we are satisfied with the configuration we can install it on the target firewall.
The installation overrides any configuration in /etc/haproxy/haproxy.cfg with the configuration obtained from the rules we view in FWCloud.